|
|
|
|
 Pro/Mini Rev 2 - Lan Box Revisited Pro/Mini Rev 2 - Lan Box Revisited
|
|
Date Posted: Feb 25 2001
|
|
Author: Joe
|
|
|
|
|
Posting Type: Article
|
|
Category: ProCooling Projects
|
|
Page: 2 of 3
|
|
Article Rank:No Rank Yet
Must Log In to Rank This Article
|
|
|
|
|
Note: This is a legacy article, imported from old code. Due to this some items on the page may not function as expected. Links, Colors, and some images may not be set correctly.
|
|
|
Pro/Mini Rev 2 - Lan Box Revisited By: Joe
|
|
|
|
|
|
|
|
|
|
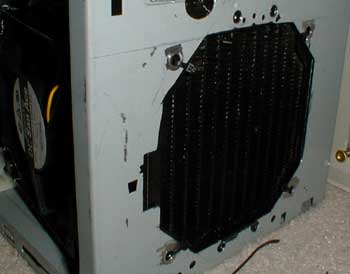
Well I figured since it has the holes for the 120mm already made in it, I could put it in place of the PanaFlo 120mm that was in the front of the case. So I attached the Baffle to it, and trimmed a lot of material off the baffle to make room for a fan to be attached to the side.
This had one more big benefit, NO plumbing changes, I don't have to as much as trim a line, it all lined up perfectly! I never have that good of luck... so its a bit of a shock.
|
|
 |
|
|
|
|
|
 |
|
|
|
|
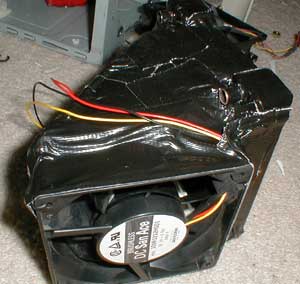
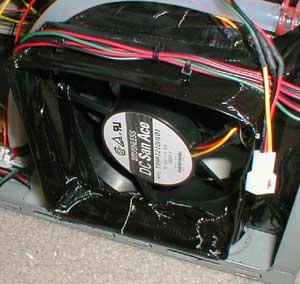
OK .. I used like a half a roll of black duct tape on this :)
There wasn't much to take pic's of as all it was was just securing everything with Zip ties, and then covering it all with duct tape to make it all very rigid and air tight.
The reason I needed it air tight was simple, I am sucking air through the duct and through the radiator, this means to get optimal efficiency from the fan I needed to make sure ALL the air came though the radiator. I also used a Sanyo 120mm fan in place of the PanaFlo due to the higher pressure ratings for it. That is important since I need to make sure the fan can overcome the extra resistance that the radiator will introduce to the air being sucked in. Higher pressure rating = more air will be pulled through the radiator.
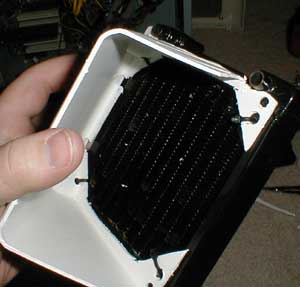
The only issue I had with the radiator was the small smooth pipe fittings, some nice ridged hose barbs would have been much better, as these are a big risk to have the hose come off of, and don't offer more then 2cm of pipe to clamp to. But this is a prototype, I am not at all sure what will be on the production ones.
|
|
|
|
|
|
|
 |
|
|
|
|
|
|
|
|
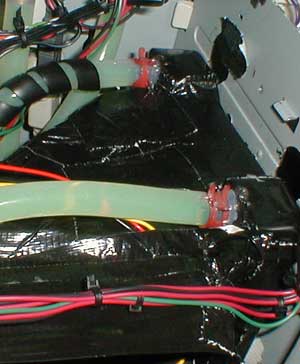
I mounted it to the front of the case with lil black Zip Ties pulled real tight. Since the holes were in the case and the hoes in the radiator matched it was very simple and straight forward.
|
|
|
|
|
|
|
|
|
|
|
 |
|
|
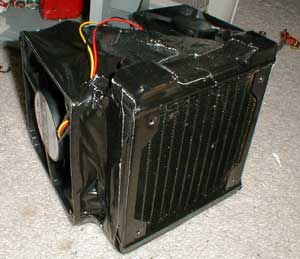
Since the fan was not perfectly flush with the door vent I made with more duct tape a nice baffle to give a very tight seal against the door vent to keep all the heat outta the case. Also the air space between the box fan and door reduce noise by a good factor. The farther the blades are from an object the quieter the fan runs.
|
|
|
|
|
|
 |
|
|
|
|
|
|
Well those lil bastard pipe fittings were interesting at best to attach to, I clamped on them with the "EZ Clamps" and then applied a liberal amount of Plumbers Goop to make sure they cannot come off on a way to the Lan. Those attachment points are still the main point of concern I have about the setup.
That's about it for the radiator work, now lets look at the GF2 change
|
|
|
|
|
|
|
|
 |
|
|
|
 |
|
|
|
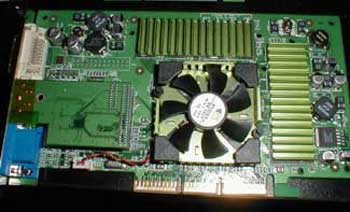
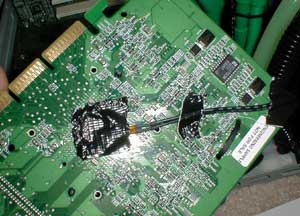
To get the temps of the core I attached the thermal probe to the back of the core ( with the handyman's secret weapon - Duct Tape) This seems to give a nice accurate core temp. Before I was taking it with the IR gun.
|
|
|
|
|
|
OK now the blorb is about a big of a deal as another one of those damn useless GeForce2 MX reviews that every one including my grandma and her dog have wrote a review of.
So with that said, there it is. Ohhhh wow eh? Only did this cause at 315Mhz the core heats up to around 115+F and can cause some instability in long runs. I had a few Blorbs laying around and thought I could finally use one.
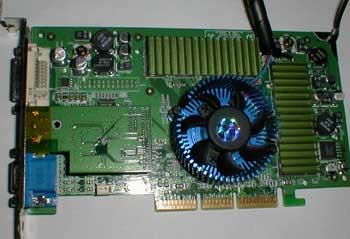
The stock HSF on the GF2 core was easily twisted off. After cleaning the core off with Acetone and getting it all purdy, I applied a very thin coat of Arctic Silver and squished the blorb on.
Yep that's it, tuff eh? :)
|
|
|
 |
|
|
|
|
| Random Forum Pic |
 |
| From Thread: What about internal pics of the storm? |
|
| | ProCooling Poll: |
| So why the hell not? |
|
I agree!
|
 67% 67%
|
|
What?
|
 17% 17%
|
|
Hell NO!
|
 0% 0%
|
|
Worst Poll Ever.
|
 17% 17%
|
Total Votes:18Please Login to Vote!
|
|