|
|
|
|
 Little Stealth Little Stealth
|
|
Date Posted: Dec 9 2000
|
|
Author: Unaclocker
|
|
|
|
|
Posting Type: Article
|
|
Category: ProCooling Projects
|
|
Page: 2 of 3
|
|
Article Rank:No Rank Yet
Must Log In to Rank This Article
|
|
|
|
|
Note: This is a legacy article, imported from old code. Due to this some items on the page may not function as expected. Links, Colors, and some images may not be set correctly.
|
|
|
Little Stealth By: Unaclocker
|
|
Project : Little Stealth - Page 2
|
|
|
|
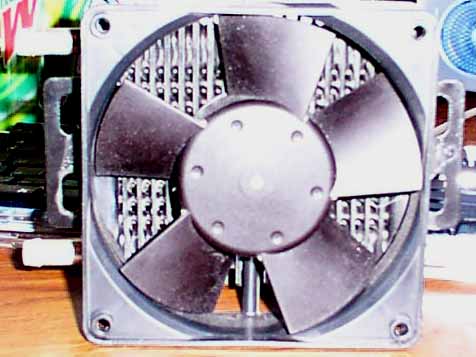
It's not too loud at 12v, I had hoped to run it at 7v, but the system just doesn't stay cool with the fan running that slow. And that about covers the radiator. I have no complaints with it, and if you want a small durable radiator, I recommend it.
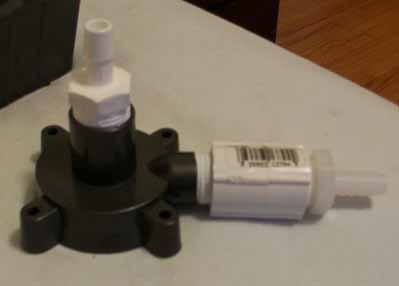
Now on to the pump. This pump is the "Supreme Mag Drive Model 2" from Petsmart.com . Don't bother trying to buy one in a local Petsmart store, they don't stock it. I paid $33 for this pump, it's an inline 250GPH pump. I'd have rather had a 150gph pump, but I was unable to locate a suitable inline model. The first thing I had to do was put nozzles on it. It came with no hose connections, just a male threaded section on the output, and a female threaded section on the input. So I bought a gender changer adapt for the male threaded part, and 2 hose connectors. I used Teflon thread tape, don't be a fool, use Teflon tape on all threads when watercooling your computer.
|
|
|
|
|
|
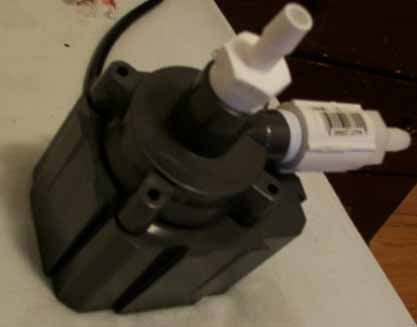
Then I proceeded to assemble the pump, and as Joe mentioned in a previous article, the o-ring on this pump isn't quite air tight, so I used some RTV to enhance the seal.
|
|
|
|
|
Also, unlike Joe's article about his pump, mine came with metal screws, not plastic, so I had no problem tightening my pump. I had chopped up the case and installed the radiator and all the fans before this pump had even arrived in the mail, so I really had no clue where I was planning on mounting it. After evaluating my options, I decided that the only place I could put my pump was right where my 3.5" drive cage was. So out came the drive, and after drilling 4 more holes in the bottom of the 5.25" cage, I screwed the pump to that, hanging upside down over my radiator.
|
|
|
|
|
|
|
|
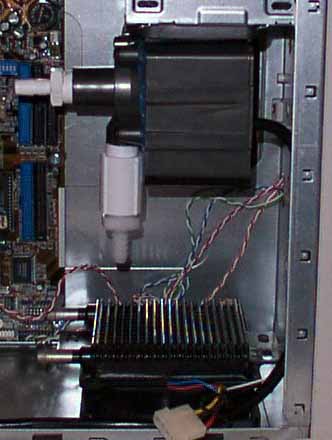
Not too bad actually. One thing I still need to do here, I didn't have any rubber washers when I screwed the pump on, so I'm constantly chasing down rattles in my case, I fully intend to put some rubber washers between the pump and the case VERY soon, that should make the pump nearly silent, at the moment, saying it's not silent is as nice as I can be.
|
|
|
|
|
|
|
|
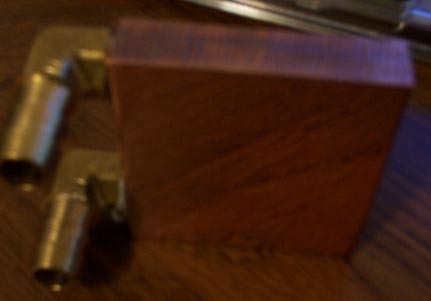
Now on to the problem child of this project, the waterblock. I knew I wanted a copper waterblock this time around. 2CoolComputer has some very nice looking waterblocks, so I decided to get one of theirs. It arrived looking just as nice as promised on their site.
|
|
|
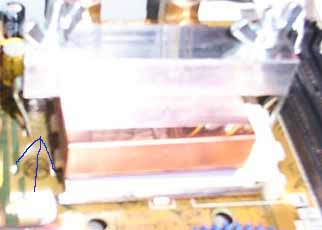
Mmm, look, a wood grained waterblock. err, anyway, yes, the waterblock is well polished. That may be part of the problem, I've read all over the net that polishing metals like this leaves the surface warped and wavy. Another complaint I have with the block is that it's only got 2 water passages drilled through it, which is just extremely inefficient, a well designed aluminum block may out-cool this block. I don't have any other blocks to compare this one against (yet), so I don't have any proof (yet). But really, those were just the least of my problems, my big problem was the clip that came with this waterblock. Here's a shot of what happened when I tried to put this block on my motherboard.
|
|
|
|
|
 |
|
|
|
 |
|
|
|
Sorry about the blur, my camera wasn't designed to take pictures that close. See where the arrow is pointing? It's pointed at a 1/2" gap between the clip, and the lug on the socket. Now if you notice the nice curve of that clip on the left, if I turn it 180 degrees to get it closer to the lug, it's pressed up against the waterblock. After bending the clip around for about half an hour, I worked out an arrangement where it kinda worked. So I turned my machine on, and guess what.. It wouldn't even post! I freaked and ripped the block back off to check out my CPU core. Nope, no cracks, chips, or anything. So I reassembled it, and tried again, still no post. I set the CPU back down to 650MHz, boom, it posted, and I sat in BIOS and watched my CPU temp climb past 65c! At which point I turned off the computer. Obviously the block was not sitting on the core, or just barely. So I did some more clip bending and some foul language, I managed to get the system to post and boot at 900. The temperature was insane, at 900MHz, it was the same temp I was getting air-cooled at 1000MHz.. So I emailed 2CoolComputer and asked them if they had a better clip I could try. I got no reply. About 2 days later, I reached into the case to try adjusting the tension of the block while the computer was on, one twist and the lug sheared off the socket. so while my computer was running, my waterblock fell off the CPU. Luckily I'm fast and I've got an actual switch on my ATX supply, so the computer was off instantly.
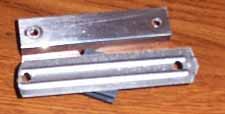
Now came the fun part, digging through my boxes of junk trying to figure out what to make a new clip out of. I couldn't use those 4 nice holes in the motherboard because the nozzles on the block covered two over them. and if I rotated the block so that they didn't, they'd hit the capacitors on the motherboard. Here's what I came up with.
|
|
|
|
|
|
It's one of the plates that goes over the slots on the back of the computer. With a pair of rubber feet to give it some height, and to center the downward force directly over the CPU core. I opted to continue using the side clips that came with the original clip, which is the worst part of the original clip.
|
|
|
|
|
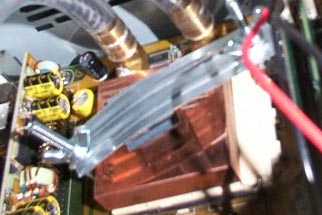
As you can see, the metal I picked isn't strong enough, it bends very easily. But at the moment, I don't have anything better, so I'll keep using it for now. This really helped, now my chip does 1GHz again, and the temps are almost where I would expect them to be.
|
|
|
|
|
|
Ok, that covers the waterblock. Now for the general watersetup info. As you may have noticed, this is a closed loop system. Closed loop systems don't need a reservoir to hold the water. The water just flows in a continuous circle, into the pump, out of the pump into the radiator, out of the radiator into the block, out of the block and directly back into the pump. Filling a closed loop system requires a lot more work than filling a system with a reservoir. With a reservoir based system, you fill the reservoir and the enclosed pump is instantly primed. (Yes, you could have an inline pump with a reservoir, I'm not even going to deal with that one). With my inline system, I had hoped that I could half-fill the system, and then turn the pump on and it would flush the last of the air out. But alas, that idea flopped. The pump found an air pocket, and stopped pumping. So I ended up having to suck the water through the system, one mouthful at a time until most of the air was out. What I had done was made the hose from the pump output to the radiator longer than needed, and then cut it, the radiator end went into a pitcher of water, and the pump end was where I was sucking. Once I got most of the air out, I stuck both ends into the pitcher, and turned on the pump.
|
|
|
|
| Random Forum Pic |
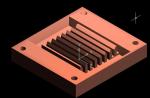 |
| From Thread: "$hitblock" by Hara |
|
| | ProCooling Poll: |
| So why the hell not? |
|
I agree!
|
 67% 67%
|
|
What?
|
 17% 17%
|
|
Hell NO!
|
 0% 0%
|
|
Worst Poll Ever.
|
 17% 17%
|
Total Votes:18Please Login to Vote!
|
|