|
|
|
|
 Watercooling with Copper tubing part 1 Watercooling with Copper tubing part 1
|
|
Date Posted: Jun 1 2002
|
|
Author: OnDaEdg
|
|
|
|
|
Posting Type: Article
|
|
Category: H2O and Evap
|
|
Page: 1 of 1
|
|
Article Rank:No Rank Yet
Must Log In to Rank This Article
|
|
|
|
|
Note: This is a legacy article, imported from old code. Due to this some items on the page may not function as expected. Links, Colors, and some images may not be set correctly.
|
|
|
Watercooling with Copper tubing part 1 By: OnDaEdg
|
|
|
|
Watercooling Using Copper Tubing Part 1
By: OnDaEdg - 6/01/02
|
|
|
|
In order for things to improve, people have to be willing to try something new. I am happy with the way watercooling has progressed. However, I still feel there are a lot of things that can be changed for the better. For all you DIY'ers like myself, the following string of articles may be of particular interest to you.
One of the areas that I think needs improvement in watercooling is the transport of the liquid coolant from point A to point B. The current method of choice is by using a soft hose such as silicon or vinyl. These hoses have the advantage of being easy to use and fairly reliable. They also have their disadvantages. For example, have you ever tried to do a sharp bend in your hosing? The first thing you probably noticed is it kinked which could potentially lead to a coolant blockage. To prevent kinking, some of you have gone to a thicker outer wall in the hose. This helps a little, but now the hose is bulky, and very stiff. One of the ways I have tried to improve my watercooling systems is reducing the space of the cooling system. I have been working on taking my cooling lines and tightly packing them in areas so that they do not protrude into the actual system. I do not like clutter! I do not like hose running in and out of power supply wires, hard drive cables, etc etc. With current hose, there really doesn't seem to be any other alternative. So I decided to look into an alternative way of routing coolant through the system. The first alternative I came up with is by using copper tubing. I did some studying on this area and I found myself learning a skill that those in the plumbing profession have been doing for years.
This first article will cover the basics of copper tube and connecting them using compression fittings.
|
|
|
|
There are several types of copper tubing that we will be using. The first type is called "soft copper" tubing. Just as the name implies, it is soft and can be bent and formed. It is mainly used in the refrigeration industry and its soft properties make it ideal for use inside a computer case. Here is some soft copper tubing that I will be using a little later:
|
|
|
|
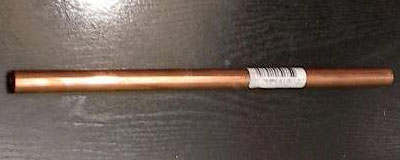
The second type of copper tubing we will be using is a semi-rigid tubing. It can be bent only slightly before it begins to kink. This tubing is often the type you will find running your water lines in your home. Here is an example of semi rigid tubing:
|
|
There are a couple of different types of semi-rigid tubing. The type we want to use is called "alloy 122 copper tubing". The reason we want to use this type of tubing is because it can be connected by using both solder fittings OR compression fittings. This is a big plus over copper tubing that can only be connected using solder.
To identify copper tubing, you have to be familiar with the naming convention that the plumbing industry uses since it is rather unconventional. For example, 3/8 outer diameter tubing is not called 3/8 in tubing. It is actually called 1/4 in tubing. A bit confusing isn't it? Here are tube sizes that will pertain to us matched to their correct outer diameters:
|
|
- 3/8 in outer diameter tubing = 1/4 in tubing
- 1/2 in outer diameter tubing = 3/8 in tubing
- 5/8 in outer diameter tubing = 1/2 in tubing
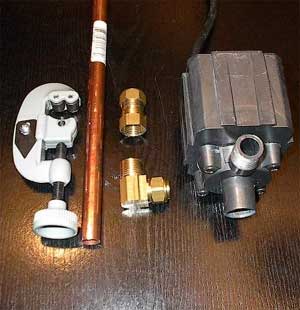
Now that we know how to reference these tube sizes, let's get familiar with copper tubing by learning to connect them using compression fittings. Here are some materials that will be needed:
- Tube cutter or hacksaw
- ½ in copper tubing (5/8 outer diameter)
- ½ in compression fittings
Notice the thick tubing I have chosen to use. The reason for this is that the system I am currently working on will have a high flow rate. The larger the tube, the more coolant my pump can push through the system. Your tubing needs depends on your own system.
|
|
|
|
|
|
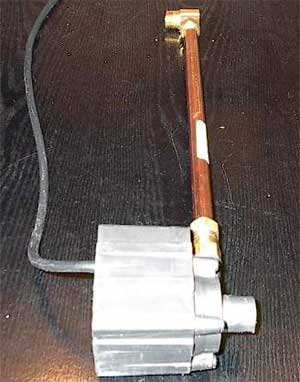
The compression fittings I am using will connect the tubing to my water pump. I am not going to go into exact details concerning the length of the tubing since there are rarely any two cases that are alike. The length you will use depends on the design of your own system.
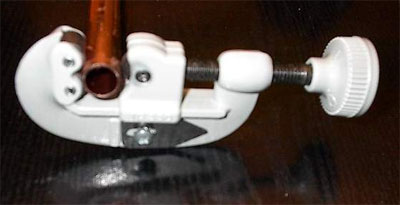
I have a tube cutter so I am going to use that to cut the pipe to the desired length. These things are very handy and only cost about 6.00 at a hardware store. I insert the tubing into the tube cutter.
|
|
Then I turn the knob on the cutter until it has pushed the blade onto the tubing. Now, I rotate the tube cutter around the tubing. After every two revolutions, I turn the knob to push the blade in a little more.
|
|
|
|
|
|
 |
|
Finally, the tubing cuts and it falls
|
|
|
 |
|
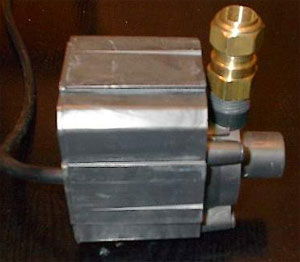
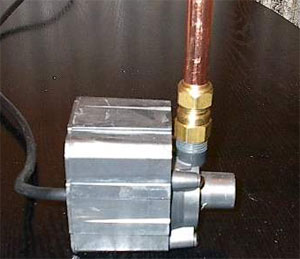
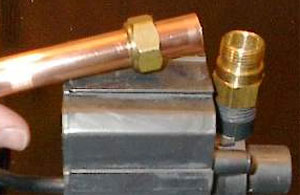
Now that we have the right size tube, let's attach it to the pump using the compression fitting. The pump I am using is a Danner Mag Drive 700. It has a 1/2in MPT (male pipe thread) outlet and a 1/2in FPT (female pipe thread) inlet. The compression fitting I am using will connect the tubing to the male outlet of the pump. First, we attach the fitting to the pump by screwing it on. I wrap all my connections with Teflon tape for precautionary reasons and I would advise for you to do the same. You can never be too careful.
|
|
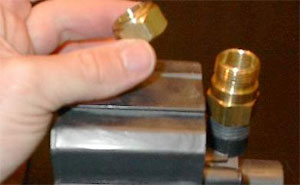
Since the fitting is attached to the pump, it is time to connect the copper tube to it using the compression fitting. First we take the sleeve and remove it from the compression fitting:
|
|
|
|
|
|
 |
|
Now we insert the tube into the sleeve:
|
|
|
 |
|
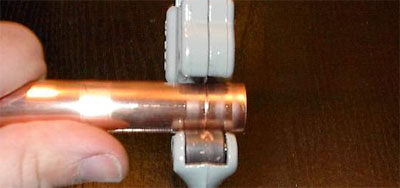
Once this is done, take the tube and sleeve and insert it into the rest of the fitting connected to the water pump:
|
|
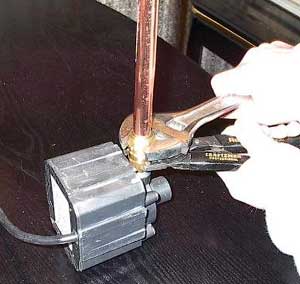
Now, it is time to tighten it. Using a pair of pliers and the proper wrench, I tighten the nut/sleeve while I hold the rest of the fitting in place.
|
|
Once it has been tightened to the point where it begins to get hard to turn, I turn it another 3/4 to 1 full turn. This is the part where the inner sleeve of the compression fitting has been compressed around the copper tubing. Once we are completed, we should have an assembled piece like this:
|
|
 |
|
At this point, we would want to connect the tubing to a radiator of some sort. Depending on the placement of the radiator we make a decision what to do next. In my system, the radiator will be directly above the tube so I would only have to connect the radiator to the tube using a union compression fitting. Many of you will have a radiator that will be to the left of the tubing. In this case, we would use a 90 degree elbow compression fitting. Using the guideline I have above for compression fittings, you connect two pieces of tubing to route the coolant 90 degrees to the left. I do not have a 90 degree elbow compression fitting to illustrate this. What I do have though is a 90 degree elbow compression fitting with a female pipe end. This will at least give you an idea of what it will look like since they are very similar.
|
|
 |
|
Simple enough isn't it? One of the great things about compression fittings is that they provide several options. You can have compression fittings that combine two tubes. Then there are compression fittings with male or female pipe thread that will allow you to hook up a variety of pieces such as hose barbs.
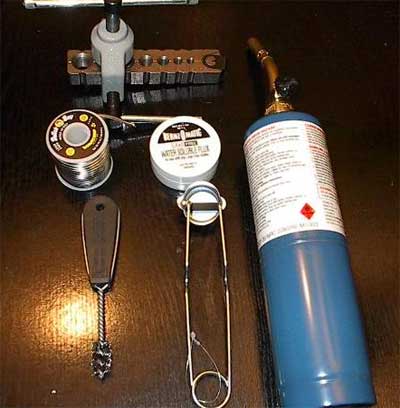
Thus far, I have merely shown you the basics of connecting copper tubing with compression fittings. The next article is going to get more in depth and it will show you another way of connecting tubing that has even more benefits and that is through sweat soldering. Take a look at some of the equipment I will be using:
|
|
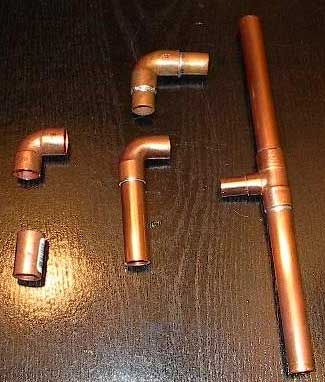
Here is a small scale example of the type of work we will be accomplishing:
|
|
The third article will then outline tube bending so that you can design a tubing system that conforms to your computer eliminating the "clutter" of typical water cooling systems. Well, I wrote enough for tonight I think. Guess that means it's back to some Virtua Fighter 4.
OnDaEdg is out!
|
|
If you have any comments or Questions please email me at OnDaEdg@ProCooling.com
|
|
|
|
| Random Forum Pic |
 |
| From Thread: Two pumps config - serial or paralell? |
|
| | ProCooling Poll: |
| So why the hell not? |
|
I agree!
|
 67% 67%
|
|
What?
|
 17% 17%
|
|
Hell NO!
|
 0% 0%
|
|
Worst Poll Ever.
|
 17% 17%
|
Total Votes:18Please Login to Vote!
|
|