|
|
|
|
 Superclock'n Overcool'n Superclock'n Overcool'n
|
|
Date Posted: Nov 30 2000
|
|
Author: Kevin
|
|
|
|
|
Posting Type: Article
|
|
Category: ProCooling Projects
|
|
Page: 1 of 2
|
|
Article Rank:No Rank Yet
Must Log In to Rank This Article
|
|
|
|
|
Note: This is a legacy article, imported from old code. Due to this some items on the page may not function as expected. Links, Colors, and some images may not be set correctly.
|
|
|
Superclock'n Overcool'n By: Kevin
|
|
SuperClock'n and OverCool'n
|
|
|
|
|
|
|
|
|
|
|
|
|
|
|
|
|
|
|
|
|
|
|
|
|
|
|
|
|
|
|
|
By : Kevin
Date: 11/30/00
|
|
|
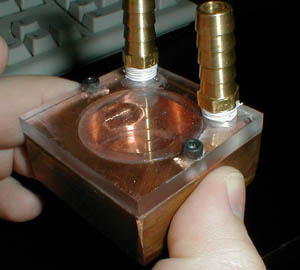
Here's a rundown on the project. I'll be using the newest and coolest (no pun intended) waterblock from Overclock Watercool. This block is really kickass, because it's copper, uses a swirly chamber similar to the tidal pool, and has a clear top for watching the water swirl.
|
|
|
|
The Block
|
|
|
 |
|
|
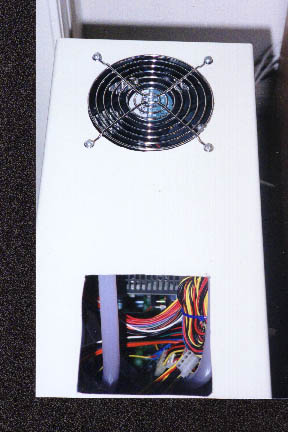
The radiator is really just a plain, average, boring radiator that I mount on a blowhole. Overclock - Watercool no longer sells the radiator that I bought, but I can say that it was nearly identical to the radiator sold in the Aquastealth. I put a Sunon 120mm High Output fan on top of it. Then I used RTV to connect the radiator to the fan, basically ducting the air through the radiator. It probably would have been better to put the fan under the radiator, but hindsight is 20-20. ( sorry for the lack of pic's of it)
|
|
|
|
The Blow Hole
|
|
|
 |
|
|
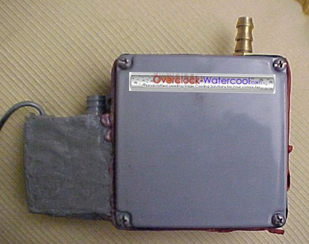
I'm also using a rese-pump from Overclock-Watercool. The rese-pump has a small reservoir with an inline pump attached to the side of it. Some places take pumps and put them inside of the reservoirs. That is bad because the heat of the pump is being dissipated into the water. The heat from the rese-pump goes into the surrounding air so the water temperature is not effected in any way. Personally, I think that pure inline systems are the best. However, it can be a pain to make sure that there is no air in the hose. So if you are new to Watercooling, I would HIGHLY recommend the rese-pump to you.
|
|
|
|
The Pump/Res Tank
|
|
|
 |
|
|
|
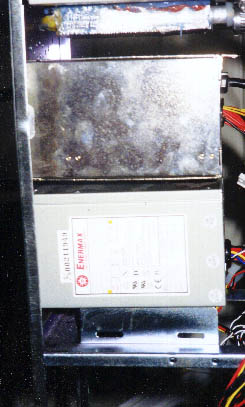
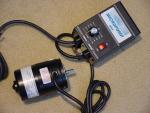
This is a small reservoir built into an inline pump. It isn't a pain to bleed like inline systems and it doesn't add heat to the water like a submersible pump... Perfect! I also have a 156w peltier from tedist.com. The specs say 15.9v and I'm running it off of the 12v line from my psu so I assume that we are somewhere near 120w. Someone e-mail me if this guesstimation is way off. Speaking of power supplies, I have a 300w AT psu powering the radiator fan and peltier.
|
|
|
|
The Power Station :)
|
|
|
 |
|
|
|
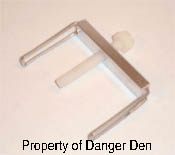
When I turn on the computer (hooked up to a 450w Enermax Tech psu), the chip will already be very cold. Lastly, DangerDen supplied the cold plate & mounting clip.
|
|
|
|
 |
|
|
|
That cold plate is very slick and shiny unlike the cold plates from some other places. No lapping was required. Here's a table for all of you visual learners.
|
|
|
|
|
|
|
|
The solution of water wetter and distilled H2O prevents corrosion and has a SLIGHTLY higher heat capacity than that of water. The solution travels through silicone tubing from mcmaster.com. This stuff really is awesome. Let's just say I feel like an ass for being excited over tubing. But this stuff has a very thick wall and is VERY flexible. I suggest you use that instead of normal vinyl tubing if you are building a new watercooler. As for the hardware, this is a KT7-RAID w/ an AMD Duron (factory unlocked) 650. The other stuff is inconsequential for this write-up. So that's everything! Now we are ready to begin.
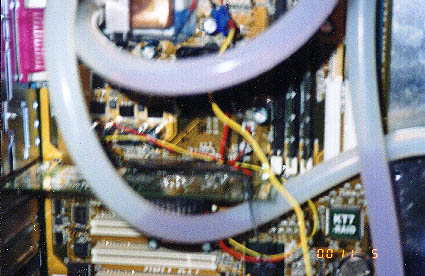
Putting Together the Loop
Then I put together all of the components OUTSIDE of the case, first. I let them run together for about eight hours before I put them in my case. If there are leaks, it may be better to see them before you fry the whole computer. Just a thought. So my water goes from the reservoir, to the pump, to the waterblock, to the radiator, and back to the reservoir, simple enough, I used hose clamps on all of the fittings. I took the H2O block (before I attached it to the loop) and smeared arctic silver all over the bottom of it. Then I evened it out thinly and nicely w/ a credit card, and slapped the pelt on the block. Another note to self. It may be better to test which side is the hot side and which is the cold side BEFORE mounting on the block, just another thought though. Moving on, I then put the nice, shiny DangerDen plate on the pelt. Okay... Now I needed them to magically stick together. I got a C clamp and clamped the three items together (use a washcloth or wooden board between the actual clamp and the block/cold plate as to avoid damaging the parts). When they were clamped together, I filled the gap between the cold plate and waterblock with silicone. I let that dry for about an hour and came back to it. Then I used this cool, white, adhesive foam and stuck it around the edges for insulation. Alrighty, the loop is done :-).
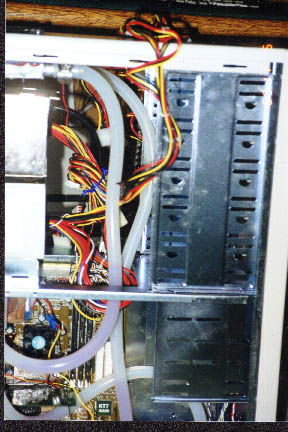
Mounting to the Mobo
This is the biggest pain in the ass when it comes to using peltiers w/ water. One has to 100% sure that no condensation occurs. I started off by covering the sides of the waterblock/coldplate/pelt w/ RTV silicone and foam. Next I filled the cavity under the CPU with petroleum jelly. I also coated the CPU pins with the same stuff. I then took RTV silicone and sealed along where the mobo meats the socket.
|
|
|
|
 |
|
|
|
Then I sealed the back by covering the pins in RTV and putting a patch of adhesive foam over it. Back to the front, I used a thin amount of silicone and sealed the chip around the edges to the socket. I slapped the block onto the duron. Then I used RTV and put it around where the foam from the waterblock meats the socket. Then I put some foam on all four sides. I used the mounting clip to further secure the block down. Woohoo! The beyatch of the project is done.
|
|
|
|
 |
|
|
|
Fire It Up!
Okay. So I turn on the computer. I enter the Abit KT7 BIOS. That's odd. My temperature is 45 degrees Celsius and escalating... Hmmm. Well, I'm a complete ass. I forgot to plug the peltier in. Oops. Small mistake :-).I will say though. The fact that the block from Overclock-Watercool can keep temps that low without the peltier on is great. Consider the fact that there is a peltier between the cold plate and the waterblock. Its just not on. That's like taking a cold plate, rubbing clay on it, sticking the block on, and having good decent temps. I assume that the block would keep the chip pretty close to room temperature without the use of a TEC.
Shutdown. Plug in TEC. Reboot. Alrighty then. Now temps are just below 10 degress Celsius. That's more like it. Crank it up to 850/1.75v. No probs. I play in Windows for a while. Great... 950/1.85v, Argh. I can screw around in Windows for about 15 minutes, but the thing crashes afterwards. I found stability at 938 mhz (not that great). At least the temperature hovers from 25 degrees to 28 degrees at load. That does go to show everyone that the rumors are true: Supercooling AMD chips does not always yield good results. These chips are limited by voltage. If I were to do the trick where I can get like 2.1v, I don't have much doubt that I'd hit 1100 mhz. To bad I've never soldered anything before in my life... I should learn.
|
|
|
|
Pics and Stuff - Page 2
|
|
|
|
|
|
| Random Forum Pic |
 |
| From Thread: I got my hands on the MOAP (Mother Of All Pumps) |
|
| | ProCooling Poll: |
| So why the hell not? |
|
I agree!
|
 67% 67%
|
|
What?
|
 17% 17%
|
|
Hell NO!
|
 0% 0%
|
|
Worst Poll Ever.
|
 17% 17%
|
Total Votes:18Please Login to Vote!
|
|


