|
|
|
|
 Yeong Yang YY0221B Cube Case Review Yeong Yang YY0221B Cube Case Review
|
|
Date Posted: Jan 7 2001
|
|
Author: Kevin
|
|
|
|
|
Posting Type: Review
|
|
Category: Case Reviews
|
|
Page: 1 of 1
|
|
Article Rank:No Rank Yet
Must Log In to Rank This Article
|
|
|
|
|
Note: This is a legacy article, imported from old code. Due to this some items on the page may not function as expected. Links, Colors, and some images may not be set correctly.
|
|
|
Yeong Yang YY0221B Cube Case Review By: Kevin
|
|
Kevin: YY0221B Case Review
|
|
The First review of 2001 starts off with a bang with the Yeong Yang Technologies YY0221B Server case
|
|
|
|
|
|
|
|
|
|
|
|
|
|
|
|
|
|
|
|
|
|
Who/What is Yeong Yang Technologies? That is the company that makes the YY0221B case. This case is
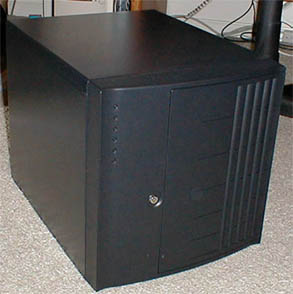
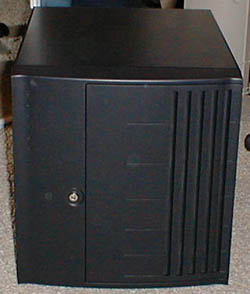
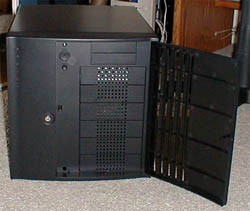
different from most that are on the market. It is a black cube: half as tall as a full tower and twice as wide. It is also the case to be used in my next project, Black Ice (overview article coming in the near future). Take a
look at the pics below to see exactly what I'm trying to describe.
|
|
|
|
 |
|
 |
|
|
You can see that there's a lock to protect against… uh… right… Yeah. It's there for whatever reason. I like the cool LED panel on the upper
left of the case. The front cover swings open revealing six full size bays, two 3.5" bays, the power button, and the reset button.
|
|
|
|
 |
|
|
 |
|
|
|
|
|
|
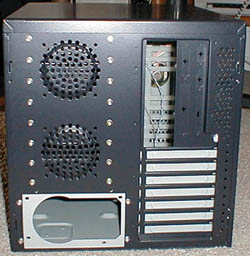
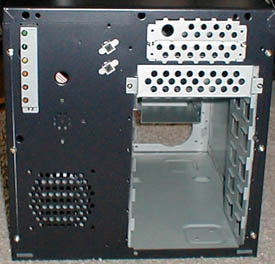
Looking at the back of the case, the layout is clearly visible. The right side in the pic is the motherboard chamber. The ONLY thing that goes on
that side of the case is the motherboard. This provides for a very mess-free environment for the motherboard to live in. The left side is the drive chamber. This is where all of the external drives are located. In addition, the
power supply and hard drives are put here. All of the screws on the left hold in the drive bays. I really like how the drive bays are removable. Black Ice will NEED these to be removed so they better be removable!
|
|
|
|
 |
|
|
|
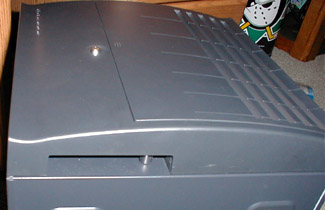
Here is the front cover with the faceplate removed. Once the faceplate is removed, you can access the side panels via the three screws on each side. This is a
slight inconvenience with this case. You have to take the front cover off before you can access the side panels. Luckily, the front panel comes off easily (no screws required). Just gently pull the handle-like cutout seen below.
|
|
|
|
 |
|
|
|
|
The front cover is held in place via these weird little clips. See the pic below for further detail.
|
|
|
|
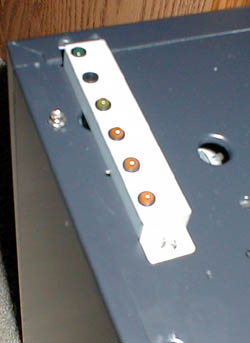
You've got the standard fan intake (92mm) on the motherboard chamber and the cool LED panel over there too.
|
|
|
|
|
|
Just from taking a quick look at this LED panel, it doesn't look like it will be too tough to swap in some purdy blue LEDs. Also, take note that
bending and ripping away at the drive bay covers is a thing of the past. Thank you YY for letting us simply unscrew the bay covers.
|
|
|
 |
|
|
|
|
|
|
|
 |
|
|
|
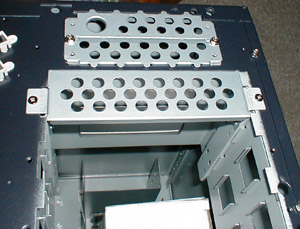
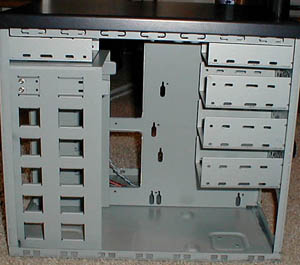
After removing the two side panels, it is clear that there are indeed two totally separate chambers in this case. Seen below is the drive chamber.
Unfortunately, the drives do have to be connected to drive rails. I don't really mind this, but I always lose the damn rails.
|
|
|
|
|
|
|
|
|
|
|
|
|
 |
|
|
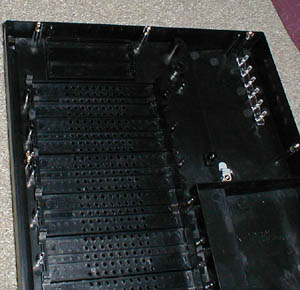
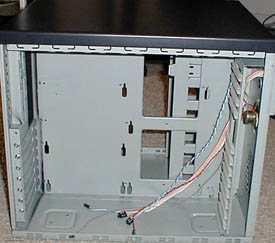
The following pic is of the motherboard chamber. As you can see, nothing goes in there except the motherboard. The reason it is open between the two chambers is
so IDE and other cables can travel between the two chambers. The motherboard tray is not removable. This really doesn't bother me at all. I have never had the use for a removable motherboard tray.
|
|
|
|
|
|
 |
|
|
|
|
|
|
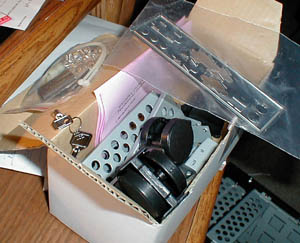
Yeong Yang Technologies gives us a small box of goodies. This box contains the keys to the drive bays (if you even use the lock), some rubber feet for the
bottom, some case wheels, drive bay covers, a bag of screws, an I/O shield, some zip-ties (don't ask me why), little stickers to label the ports on the I/O shield, and a short-but-sweet manual.
|
|
|
|
|
 |
|
|
|
|
So overall, what do I think of this case? I love it. I think it is beautiful. I need the wideness, because I'm going to be mounting two BIG
radiators on the top of the case. The stock cooling of it isn't that great. There is a place to suck in the front and two places to blow in the back. If you are reading this article, it is CERTAIN that you don't have stock
cooling anyway. My dremel should fix this badboy up J. I highly recommend this case, especially to watercoolers. There is a lot of extra room in this case (above the power supply when the drive bays are removed and in the
motherboard chamber). This gives the crazy cooler room to put whatever he or she may please to put in those spots. You'll see what I did with those spaces when I put out my Black Ice overview article (near future). I have some
pics of my window mod in progress and more info on Black Ice in the Pro/Forum if you wanna check them out. E-mail me with any questions you may have about the YY case or anything else. For prospective buyers, I bought this from www.servercase.com KRI Computer. They sell it for $150. The service was great, and I haven't seen a cheaper price on this case anywhere.
|
|
|
For a Guru Aka:Geek
|

|

|

|

|

|
|
For a Game'n Freak
|

|

|

|

|
|
|
For a Average Joe
|

|
|
|
|
|
|
|
|
Pros & Cons:
Pros-
Great black paint job
Drive bays that unscrew
Cool LED panel
Motherboard separated from everything
Innovative look
Wide top for multiple radiators
Lock for people burglars trying to steal your CDR and not your whole computer :)
Cons-
Stock cooling is kinda crappy
Must remove front cover to gain access to the side panels
Motherboard tray not removable
|
|
|
|
| Random Forum Pic |
 |
| From Thread: My firs attempt at watercooing |
|
| | ProCooling Poll: |
| So why the hell not? |
|
I agree!
|
 67% 67%
|
|
What?
|
 17% 17%
|
|
Hell NO!
|
 0% 0%
|
|
Worst Poll Ever.
|
 17% 17%
|
Total Votes:18Please Login to Vote!
|
|


 Yeong Yang YY0221B Cube Case Review


