|
|
|
|
 Tyan Thunder K7 SMP Motherboard Review Tyan Thunder K7 SMP Motherboard Review
|
|
Date Posted: Jun 27 2001
|
|
Author: Joe
|
|
|
|
|
Posting Type: Review
|
|
Category: Motherboard Reviews
|
|
Page: 3 of 4
|
|
Article Rank:No Rank Yet
Must Log In to Rank This Article
|
|
|
|
|
Note: This is a legacy article, imported from old code. Due to this some items on the page may not function as expected. Links, Colors, and some images may not be set correctly.
|
|
|
Tyan Thunder K7 SMP Motherboard Review By: Joe
|
|
Tyan Thunder K7 System Review and OC'n
|
|
|
|
|
|
|
|
|
|
|
|
|
|
|
|
|
 |
|
|
|
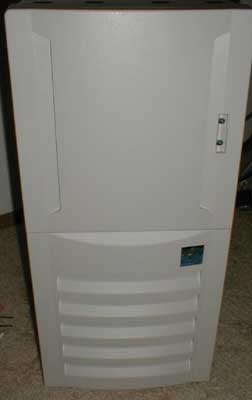
The Front of the case is pretty uneventful, and it has a door. Most doors suck ass, as you cant get them out of the way unless they are closed.
This one is double hinged so it will swing flat back against the side of the case. OMG its a door that someone REALLY engineered!!
Its got some serious LED Deficiency though.. This machine could use about 10 LED's for all the goodies the mobo got going on ( LAN LED Headers on the mobo etc..). Its got nice open front vents to let the 120mm fan behind it breath easy.
|
|
|
|
 |
|
|
|
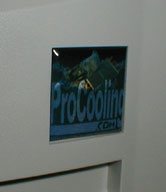
What's that I spy? None other then the long since believed dead - ProCooling case badge! The company FINALLY got them done and to Case etc. So if you
want go and ProCool your rig.
|
|
|
|
|
|
|
|
|
|
 |
|
|
|
|
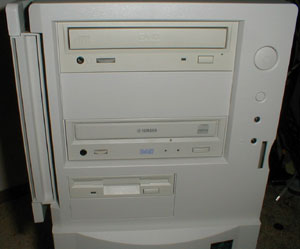
Yes the peripherals are not top end. That is a 6xDVD/32x CDROM - SCSI2, and a Yamaha 6/4/16 writer. They get the job done so I don't complain and
they work. Which is more then I can say for higher end IDE devices I have tried... but that's just me.
Not much else going on here.... :)
|
|
|
|
|
|
 |
|
|
|
|
|
|
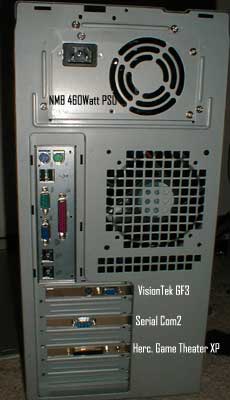
The back you can see the caged in 120mm Fan.
I will be removing the stock grates with a dremel in the coming weeks to replace them with the nice chromed wire ones.
You can see how the IO panel and everything fits. Not much to say about this either ;)
|
|
|
|
|
 |
|
|
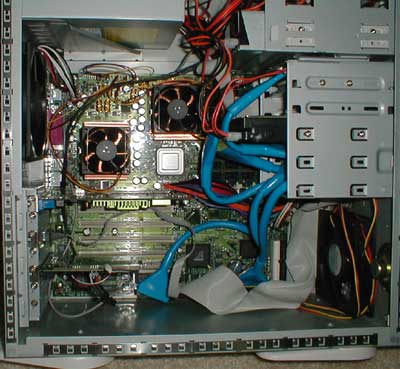
That's the inside. Not nearly as cluttered as it could be. besides for the misc. fan header wires, and power runs its pretty clean.
The Blue rounded wires were bought from KD Computers, I have them for the U160SCSI and the Floppy, I am waiting on a 50Pin SCSI blue
rounded one to go with it. The SCSI ones are LVD cert but do not claim U160 Cert. I have used this IBM Ultrastar 73LZX 36.4GB HD on it for over 3 weeks with out any issues, in fact I used this wire to overcome some
sync issues I had with the cable offered in the box!
|
|
|
|
|
You will also notice the second ATX style header is not running down with the rest of the Mobo power, I am running it behind the PSU and then down an area
between the PSU and side of the case. so its not in the air flow of the CPU's at all. The Big ATX style connection ( 24 pin) is run around the front of the motherboard in front of the RAM sockets. This also
keeps it out of the air paths. You can see the 2 Low Power 3 pin 120mm Sunon BB fans. I wanted to use LV fans due to the noise.
There is also a 3 pin 80mm fan infront of the HD blowing in. I removed the stock box that goes around the front 120mm fan to let it breathe easier to the inside of the case. With 2 100watt CPU's you need all the air you can to keep it cool.
I tucked the extra data cables below the HD to keep the inner area of the machine clean, and stuffed the miles of extra PSU wire ( makes Enermax power cables
seem short), bundled under the DVD drive and above the writer.
|
|
|
|
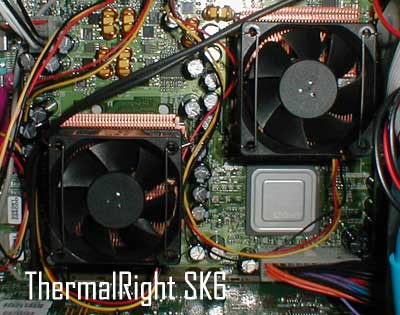
For such an incredibly powerful rig, what else should cool them but the best thing since sliced bread? :)
Its little secret that I really like the SK6 HSF's, for their light weight, all Cu design, and also the fact they more an incredible amount of heat.
I first found out about these HSF's well over a month ago at KDComptuers where they gave me a prototype one they had received. I have to say between the Prototype and production, ThermalRight improved the Lapping and polishing done on the bottom, VERY nice job.
|
|
|
|
I am generally against HSF cooling in favor of water cooling, but for my main machine that runs 24/7 and contains a lot of data I use daily, I couldn't risk
it. So I went with the next best thing - the best HSF's you can find currently.
The fans on top are the high speed Sunon dual bb 4500RPM fans.
They move 25CFM of air and are very quiet.This machine is in my living room so its got to be quiet, or reasonably quiet. If I were to run dual Delta 7200 rpm fans, my neighbors would be pissed. I also would prolly go insane and start kicking the crap out of my machine in the middle of the night when I cant fall asleep cause it sounds like a Rolls Royce Jet engine is at 100% throttle in my PC. ( hehe gives you an idea of how much I hate those POS delta fans...) So instead of relying on high CFM on an inefficient and lacking design ( thermoengine), I chose to use a lower CFM tolerable fan, with a very efficient and functional design. Unlike the CAK or other Cu fans the fin structure is very light on this HSF allowing 2 to be used on a mother board without the worry of busting the board in half :)
|
|
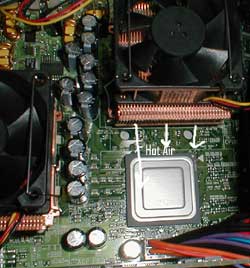
The ONLY 2 issues I have with these HSF's on this board are :
- The HSF's vent up and down, which goes perpendicular to the air flow in the case, it also vents the hot air onto your video card core (
perfectly lined up) and also onto the already hot chipset. The top HSF also vents its hot air right into the PSU making the PSU run even hotter ( if that's possible without causing a small nuclear meltdown).
- The Clips use a small flat blade screw driver, that's great on most boards. But on the Tyan Thunder K7 you need to remove the back 120mm
fan and one DDR Ram chip. Also you run the risk of slipping and sending a flat blade screw driver into your 500+$ motherboard.
With that said, I think the benefits still out weigh the drawbacks.
A HSF that will run the air flow in the proper direction is the new Vantec Cu fan. I have one here ( with a Delta... Argh..) and it seems to fit great, just cant wait for them to hit the market.
|
|
|
|
|
|
How cool did the HSF's keep the CPU's? Impossible to tell. The BIOS reads 80Deg C for them. Which is SO wrong its not even funny.
The reason its wrong is that the Tbird CPUs do not have thermal Diodes like the MP's do. So the board is reading something that's no where remotely associated with temp ;) As far as I can tell there is no CPU temp reading on the motherboard if the CPU doesn't have a thermal diode.
|
|
|
|
The CPU's is an area that I am not really happy about at all. We have a board meant to run 2 Athlon MP's but are running 2 thunderbird 1.2Ghz AXIA CPU's.
I was planning on running some Durons in here to test with, but mysteriously I had a Duron stop posting on a test rig I am running, ( dead chip.. cant RMA as I was testing etching the bridges off on it :)
So the review is being done only with Thunderbird cores. This is not what I was planning, but eh, life goes on.. or so the song says :)
|
|
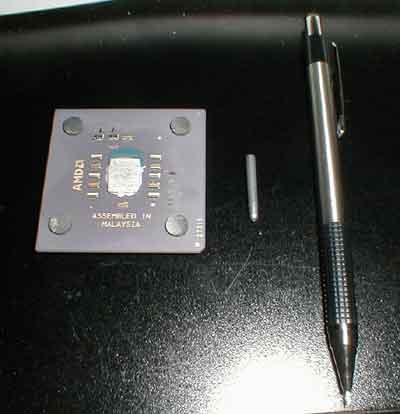
Here is the basics -
- AMD Cpu - Duron / Tbird / MP / Athlon 4
- Diamond Engraving tip ( made by Dremel # 9929 - 25$)
- El-Cheapo $1.25 Mechanical pencil ( .5mm HB lead)
OK that there is a 1.2Ghz AMD Tbird with an AXIA- Y core. It runs 1.6Ghz stable at 2.1VCore in a Abit - KT7A.
Since the Thunder K7 motherboard offers NO Vcore, or multiplier adjustments. All changes need to be made to the chip itself and in a fairly invasive
way. Another way is one that UnaClocker worked on a while ago: Here
The method for changing the stuff on the chip itself requires the above tools, + a flash light, and steady hands.
|
|
|
|
|
|
First thing you need to do is put the CPU in a board with a heat sink a lil worse then the one you will be using in your Thunder K7 ( so the core runs hotter,
this will compensate for the extra heat inside the case having 2 Tbirds cooking next to each other).
The board you put it in should be able to change VCore and Multiplier. Now with a stock 266 FSB change the multiplier to as high as you can and still keep the machine stable ( run Prime 95 or something for a few hours). This will tell you the max you can clock the chip stable on the Thunder. Do this with both chips and and figure the highest common speed.
|
|
|
|
|
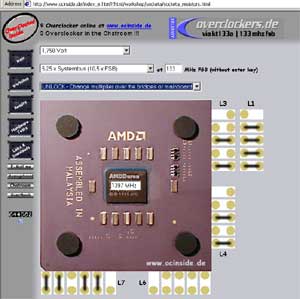
Now that you know your target speed, go to OCInside. It has the best damn lil Java Craplet you have seen for this work. Check it out here . You tell it what speed you want to go and it will tell you the bridges that need to be connected/broken to get the CPU to report that to the motherboard. This works for all Duron's and Tbirds. A -MP's and A4's are not so sure yet.
Once you get the VCore and Multi you want, print out the sheet. ( the screen to the side shows 1400Mhz 10.5 x 266Bus at 1.75 VCore.)
I have not tested with any VCore higher then 1.75 as I am not sure if the VRM's on the motherboard are capable of that for extend periods of
time.
Ok so get your print out ready and in hand!
|
|
|
Pics below are a Duron I used to test all this before I went and touched the Tbirds
|
|
|
|
|
|
|
|
This was a pic after the fact, only one I had to bear with me :)
|
 |
|
|
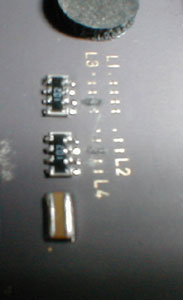
Next look VERY closely at the bridges for L3, L4, L6 and if you are making VCore changes - L7. L1 is useless on the Thunder K7 so I just left them
unlocked.
Find the bridges that are CLOSED and see which ones match the sheet of paper you have just printed out. Cross off all the ones on the piece of paper that
are already connected on your CPU. ( use a mag. glass if needed to see if its connected or not.) The ones that are closed on the CPU and open on the paper are what we are concerned with. Mark those on the paper
separately.
Now, we get into surgery.
|
|
 |
|
|
|
|
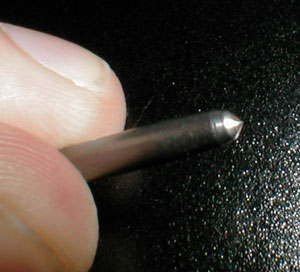
Now its time to bust you the Diamond tipped bit.
The reason we need diamond is because the ceramic is harder them steel, aluminum, glass, and Tungsten. Diamond is harder though. The bit needs to have a very fine point to it.
|
|
|
|
|
 |
|
|
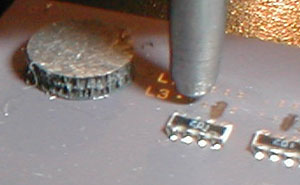
Now, have a beer (if your old enough of course).
This will hopefully help steady your hand, and calm you nerves :). ( how many How 2's have you drink a beer?... man if only)
Now with your newly calmed nerves, line up the bit a little above the bridge you want to break, EXACTLY IN THE CENTER of the bridge.and with a
|
|
|
|
|
good deal of pressure ( not enough to break the CPU), drag the diamond tip across the trace. go back and forth JUST UNTIL YOU BREAK THE BRIDGE, if you keep
going back and forth you will dig into the ceramic layers and cut the traces that go to the pins = dead CPU.
with a flash light and a mag. glass check to make sure you have broke the connection. Do that for each that NEED to be broke, but do not do it to the ones
you need connected later. Also, the reason for doing the break in the middle of the bridge is so that you have the pads left to reconnect at a later time if needed.
Now this will perm void your warranty, not that many people ever are concerned with that, but you do need to know, if you do this, you are going to possibly
kill your core, void your warranty.
|
|
We will use the pic above for the next part also.
Take your .5mm HB lead pencil and now ... on your still calmed nerves, draw a line over the disconnected bridges that your piece of paper says that you need to
connect. go back and forth to make sure you get graphite to fill the small valley created between the bridges by the laser cut.
DO NOT connect 2 rows of bridges together... that's a no no...
so just do like in the picture, each bridge connects to itself only, NEVER to another bridge. So please, color in the lines :)
|
|
|
|
|
|
If all goes as planned you do that to both CPU's. Put them in the board you tested the max speed on to see if they are detected at the proper VCore and
multiplier. If they do, strap them into the Thunder, and power it up and see what it reads.
|
|
|
 |
|
|
|
2 x 1.4Ghz CPU's from 2x 1.2Ghz CPU's at 1.75VCore.
|
|
|
|
| Random Forum Pic |
 |
| From Thread: my waterblock |
|
| | ProCooling Poll: |
| So why the hell not? |
|
I agree!
|
 67% 67%
|
|
What?
|
 17% 17%
|
|
Hell NO!
|
 0% 0%
|
|
Worst Poll Ever.
|
 17% 17%
|
Total Votes:18Please Login to Vote!
|
|