|
|
|
|
 Radiator Roundup 1 Radiator Roundup 1
|
|
Date Posted: Aug 15 2001
|
|
Author: Joe
|
|
|
|
|
Posting Type: Review
|
|
Category: H2O and High End Cooling Reviews
|
|
Page: 2 of 3
|
|
Article Rank:No Rank Yet
Must Log In to Rank This Article
|
|
|
|
|
Note: This is a legacy article, imported from old code. Due to this some items on the page may not function as expected. Links, Colors, and some images may not be set correctly.
|
|
|
Radiator Roundup 1 By: Joe
|
|
The Test Setup - The "Crucible": ( long page)
|
|
|
|
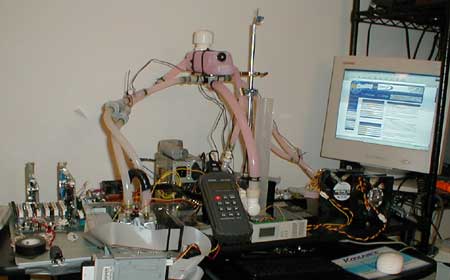
As I showed in the Water Block roundup Plan, the "Crucible" is the impact range for all these roundup's and test's for the future.
The Rig is versatile, robust, and very controlled.
For the Radiator tests it was setup just for testing radiators. This was done so that it would give the most accurate data from test to test. A couple changes were made to the system to accomplish this.
|
|
|
|
This is one of the most unique parts to this machine and by far the weirdest.
|
|
|
|
|
|
|
|
|
|
|
|
|
|
|
|
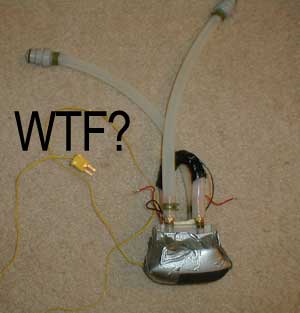
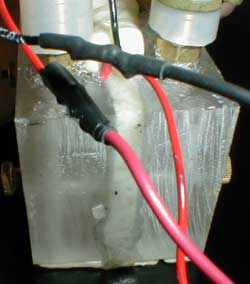
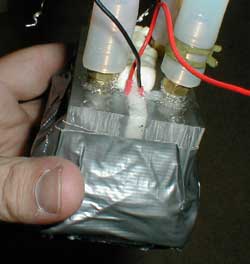
I added the "WTF" for you, cause I know that's what a few thousand of you just said. I know that's what I said when I first saw this.
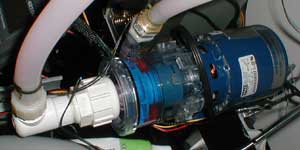
In all seriousness, its a waterblock / pelt combo. Not just one, but 2.
|
|
 |
|
 |
|
|
|
 |
|
|
Alrighty, I whipped out Power Point and made a nice lil drawing of what this thing is.
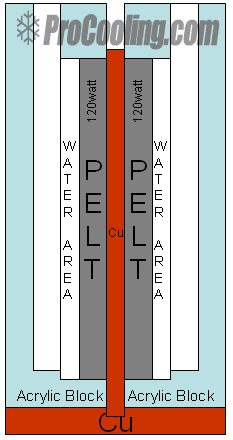
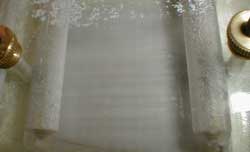
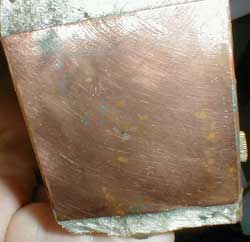
There are 2 120watt Pelts on a central Cu plate. That plate was forced into a base plate and then soldered. To cool the pelts 2 acrylic housings push the coolant right onto the pelts surface. This is direct pelt cooling I guess you could call it. I personally think its a fire hazard, and a disaster waiting to happen, but that's just me ;) The entire works is then sealed with "GOOD STUFF!" type expanding foam, and silicone. There are 2 bolts running from side to side to maintain pressure on the 2 blocks against the pelts, and center plate.
At 2x 120watts this should be good enough to see if the radiators can handle a pelt cooled CPU. Future tests may combine this with a 172watt pelt on the
bottom giving a grand total of 412 watts of heat... now that's a fire hazard.
This block was not intended to be used for this, as it was just an idea Chip at overclock-watercool had and sent it to me to look at. But it came in
great use for this project!
|
|
|
|
|
 |
|
|
|
 |
|
|
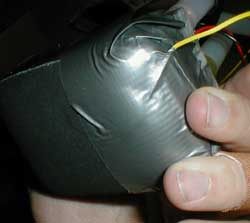
Speaking of that, The insulation was simple and quick. I used 3/8" thick Neoprene and wrapped the bottom and sides with it. I sealed the
entire works with the handyman's secret weapon - Duct Tape.
|
|
|
 |
|
|
|
|
|
|
 |
|
|
|
|
In the one pic you can see the thermocouple going under the base and into the neoprene, this is so we can tell how cold the cold plate gets. One of the many
temp readings in the tests is "Cold Plate" temp. We are judging the effectiveness of the radiators based on how cold the cold plate gets. We
|
|
|
|
|
|
are not going to document it as "it cooled 240 watts this effectively" as the heat source is not a 100% verified that it produces exactly 240watts.
Instead we are assuming there is around 240 watts of heat being generated, and this is a constant for every test.
I personally hate using Pelt's as a heat generator as they are not 100% constant in how much heat they produce.
They are heat pumps so any "cold leak's" in the base or through the neoprene will actually push more heat to the water and in effect produce more than 240watts. To get a 100% verified heat source you would need to pay in excess of 4000$ for a metered and controlled heat surface generating exacting wattage's in excess of 200 watts. So I think 2 30$ pelts are good enough for what we are doing ;)
Please do not E-mail me telling me all the flaws there may be in the dual pelt block, because they simply don't matter in the test.
We are testing every radiator with the exact same heat source, therefore all of the data in the test can be related to one another.
Ok now that that's over lets see what's going to power this:
|
|
|
|
|
|
|
|
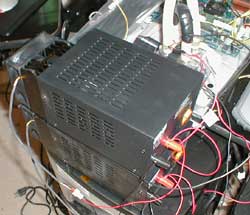
These are 2 200watt 13.8v @ 12Amp PSU's. I picked them up for 40$ a piece at a local surplus shop new.
These are big, heavy, and real nice.
They are more than just a power converter, they also filter and condition the power to make sure its a clean 13.8v. Running lower power devices ( fans, etc..) they produce almost no heat. Powering Pelts and other high amp devices, they heat up like a space heater.
|
 |
|
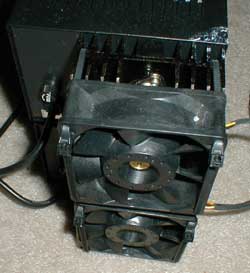
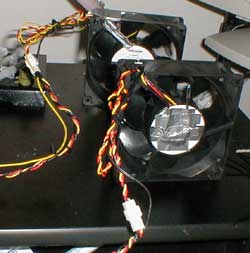
To combat the heat produced by powering the high amp pelts, I bolted on 2x SanyoDenki 92mm high speed fans onto the rectifier Heatsinks.
These things WILL thermal shut down if they are run at peak draw for beyond the duty cycle but with the fans I ran them at full load for much longer than their
duty cycle already. I powered the fans on the back of the PSU off the PSU's 13.8v power so they came on when the power supply was turned on.
With these PSU's turning on at the same time with a full load on them, I needed to move some computers onto another power circuit in my apt as it would have
blown a breaker easily.
These power supplys will easily run the 120watt pelts at their max power.
After a 30 min run, even with the fans, the PSU's would be almost 130DegF on the top!
|
|
|
 |
|
|
|
|
The Cooling System -
|
|
|
|
|
|
|
|
|
|
The Hydrothruster is the Pump of choice for the Crucible. It has an awesome 10PSI rating, and will increase pressure to keep coolant moving
even when the line becomes restrictive. If you notice, the front is a 3/4" intake with a 3/8" exhaust. This makes the coolant jet at top pressure through the system. The 3/8" tubing DOES lower overall GPH by a
massive amount though.
|
|
Swiss Flow Digital Flow Meter
|
|
|
|
|
|
|
|
|
|
|
|
 |
|
The Difference between real Flow rates that the pump is rated, and the real world flow rates are a far cry apart.
This Pump is rated to 500GPH at head. That's assuming an open unrestricted intake ( which we have), and a full 1/2" dia. exhaust line for only a few inches. Running 3/8" for 15 - 20ft of silicone hose through 4 quick disconnects drops the effective GPH down to 120Gph. Before you gasp, have you ever known what your system was really running?
This was measured and verified with a new Swiss Flow digital flow meter. Unfortunately the flow rates for the different radiators are not accurate.
This is because the one flow meter I was using in this test set had a few fibers ( like a hair or a carpet fiber) get wrapped around the impeller, and slowed the readings about 2000RPM (6000 RPM is 1 LPM). This has been
fixed with a new flow meter but after all the testing was completed. I recommend to anyone running a flow meter like the swiss flow, to buy a high flow filter and place it before the flow meter.
It will save you a 100$ flow meter being shot from a few fibers.
|
|
 |
|
|
There will be no flow listing in the round up this time. I don't like posting info I know is inaccurate.
|
|
|
|
|
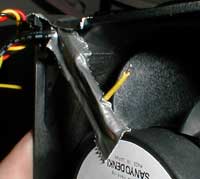
The fans that will be cooling the radiator are Panaflow H1A's. One will be pushing into the radiator and the other will be sucking.
This will give a max CFM of airflow over the entire radiator surface.
Each fan will be off 1" from the radiator surface and baffled with Duct Tape. The Intake fan has 2 sensors on it and the Exhaust fan has 1 sensor on it.
|
|
|
|
|
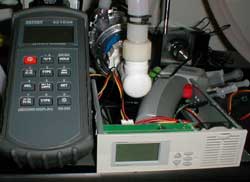
The all of the Temp readings are coming from those 2 devices. The DigiDoc5 and the ExTech Thermometer.
The Probes that are going to be on the system are this:
ExTech -
- The Intake Air temp going into the radiator
- The Cold Plate temp on the heat source.
The ExTech will sample once every second to get those temps for the entire 30 minute run.
DigiDoc 5 -
- Ambient on top of the test pole ( look in the picture of the setup at the top of the page, it the small probe sticking up from the pole)
- The Intake Air going into the radiator
- The Exhaust Air exiting the radiator
- The Coolant temp going into the radiator
- The Coolant temp leaving the radiator.
The DigiDoc will be recorded by hand at the beginning of the test and ever 5 min after for the entire 30 min run.
|
|
|
The Temp Reading System -
|
|
|
 |
|
|
|
The Intake DD5 Probe
|
|
|
 |
|
|
|
The Intake ExTech Prove.
|
|
|
|
|
|
 |
|
|
|
|
|
|
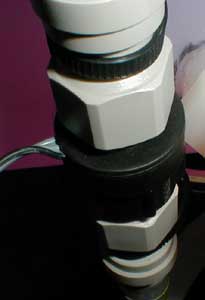
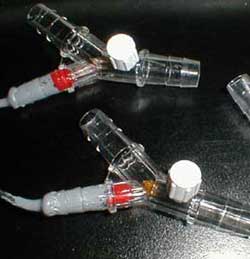
Custom Inline Coolant probes
|
|
|
 |
|
|
The Inline coolant probes were something I made myself as most of the ones available either don't get anywhere close to a good and consistent reading between
one probe to another, and also don't sample from IN the coolant, just on the edge.
I found these "Y"'s at a local lab supply store. They are a DigiDoc5 flat type probe inserted at a an angle into the middle of the coolant flow. They are
set on edge so they do not disturb the coolant at all yet get readings from in the center of the flow.
The wires that lead to the actual probe are sealed in silicone to keep the water from affecting the reading. The entire works is then set in place with epoxy. There will be an article covering how to make these, so I am going to keep this brief.
|
|
 |
|
|
 |
|
|
|
|
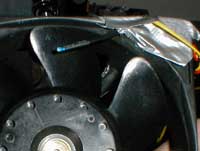
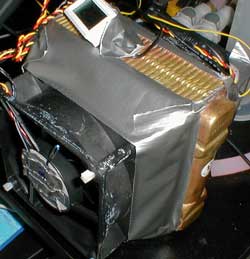
The radiator set into the test rig looks like this big momma did when I was testing it.
The real tests were run with the radiator standing up to remove all air pockets in it. You can see the front exhaust air temp probe on the fan there.
|
|
|
|
The Test will be run like this:
- The Cooling system will be switched on 15 seconds before the heat source ( to work out any last min leaks).
Once the heat source is turned on logging will start on both the DigiDoc5
( by hand) and the ExTech Thermometer ( automated). The test will run uninterrupted for 30 minutes. At the end of the 30 minutes the logging will stop.
- The Temperature for the intake temps cannot vary by more than 5 DegF for more than 1 minute over the starting temps
recorded. If the temps are 5 degrees over or below the starting temp, the test run is invalid.
|
|
|
|
| Random Forum Pic |
 |
| From Thread: My External WC rig completed |
|
| | ProCooling Poll: |
| So why the hell not? |
|
I agree!
|
 67% 67%
|
|
What?
|
 17% 17%
|
|
Hell NO!
|
 0% 0%
|
|
Worst Poll Ever.
|
 17% 17%
|
Total Votes:18Please Login to Vote!
|
|