|
|
|
|
 Crystalfontz CFA-631 3.5" LCD Review Crystalfontz CFA-631 3.5" LCD Review
|
|
Date Posted: Mar 10 2006
|
|
Author: Joe
|
|
Index:
|
|
|
Posting Type: Review
|
|
Category: Thermal Management Reviews
|
|
Page: 2 of 3
|
Article Rank: from 1 Readers
Must Log In to Rank This Article from 1 Readers
Must Log In to Rank This Article
|
|
Forum Discussion Link
|
|
|
|
Crystalfontz CFA-631 3.5" LCD Review By: Joe
|
Putting the CFA-631 to use
Getting it into the case was pretty simple. The 3.5" cage in the Silverstone case sits a bit farther back than most cases, so I had to mount it with only one screw on either side. There are tabs in the cage to hold the front level, one screw is really all that was needed.
 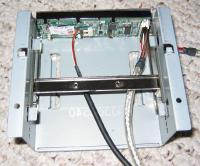
It took a bit of fussing to get the drive aligned right with the front of the case, but in the end it did look nice.
The SCAB installation
For those who haven’t ready the CFA-635 review I will explain briefly what the SCAB board is. The SCAB board is the accessory board available for the CFA-635 and CFA-631 that adds the ability to control 4 fans and up to 32 temp sensors. It also has ATX power control and thermal management features that integrate with the Crystalfontz software and hardware. The acronym S.C.A.B. stands for System Cooling Accessory Board.
The SCAB board could have been installed on the back of the CFA-631, but in this case we are going to use the long remote mounting option for it.
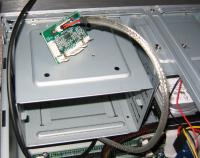
In the above pic you can see the remove cable and the SCAB board extending from the 3.5" bay which is now nicely hidden in the machine. In the mounting pics above you can see where this silver braided cable leads to and how on the CFA-631 only USB and the SCAB cable are needed.
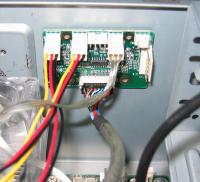
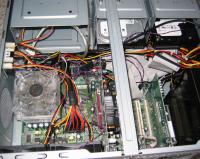
I found a place for the SCAB to mount on the side of the case near the processor. This places the SCAB in reach of all the fan connections I needed. In the above pic you can see how it all was connected (some connections weren’t yet done when the pic was taken). It's held on the side of the case with Servo tape (2 sided foam tape that’s used in R/C stuff). The SCAB board has a protective plastic backing on it, so it can be mounted onto a metal or conductive surface without causing a fire.
Wiring the case for full control
Because I had a limited number of temp probes to use, I had to take temps from the most important areas of the machine. I have a large number of probes from Crystalfontz, but some are/were being used in a calibration test, and some are broken or had bad wires after long-term usage. For this system, I am using 4 DOW temp probes.
The areas I wanted to get temps for, and what fans they would control are here:
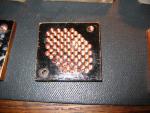
- CPU Temp- Taking the temp from a probe in the HSF fins, and controlling the CPU fan. This temp will also have a weight on the rear fan of the case by the HSF, so if the CPU heat goes up the rear fan will start to go a bit faster.
- System Temp- This will be a temp from around the CPU area, taking ambient in that area. Both rear fans will be weighted mostly on that temp.
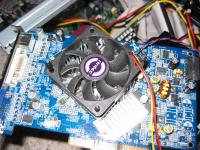
- GPU Temp- This fan needed the most control as it was by far the loudest fan in the system. I wedged a sensor into the GPU HSF. This sensor only controls the GPU fan.
- HD Temp- This watches (in a not entirely accurate way) the case temp of the HD. Its held on with just a piece of electrical tape. The rear fans are weighted on this, because the hotter the HDD, the more I want it to pull in fresh air from the front of the case.
Below are pics of the different sensor installs:
 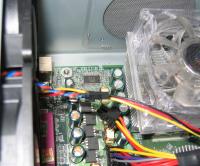
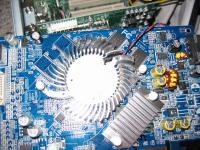 
The GPU install was possible since I was no longer using the stock fan. I mounted a extra 60 mm fan I had laying around on to it so I can spin it real slow and control it via the SCAB board.
The finished install looked like this, with all the temp sensors and all the fan power runs going to the SCAB board:
That’s about it for the hardware side of the installation, onto the software!
|
|
|
|
|
| Random Forum Pic |
 |
| From Thread: Chieftec big tower wc'ing in progress |
|
| | ProCooling Poll: |
| So why the hell not? |
|
I agree!
|
 67% 67%
|
|
What?
|
 17% 17%
|
|
Hell NO!
|
 0% 0%
|
|
Worst Poll Ever.
|
 17% 17%
|
Total Votes:18Please Login to Vote!
|
|


