|
|
|
|
 Supercooling and Insulation Supercooling and Insulation
|
|
Date Posted: Jun 2 2000
|
|
Author: Rich W
|
|
|
|
|
Posting Type: Article
|
|
Category: High End Cooling
|
|
Page: 1 of 3
|
|
Article Rank:No Rank Yet
Must Log In to Rank This Article
|
|
|
|
|
Note: This is a legacy article, imported from old code. Due to this some items on the page may not function as expected. Links, Colors, and some images may not be set correctly.
|
|
|
Supercooling and Insulation By: Rich W
|
|
Super Cooling and Insulation
|
|
|
|
|
By : Rich W
Date: 6/1/00
|
|
|
By now, just about everyone into the overclocking scene and not living under a rock has heard of water cooling. Water cooling can offer much greater cooling potential than air cooling because of the superior thermal properties of water over air. Many people have built their own water cooling rigs, and also many companies have put out kits that you can use to cool your CPU with water. However, using only water cooling pulls the CPU temperature below ambient temperature only under unusual conditions (perhaps when the water reservoir is chilled with an A/C or with ice packs). Some of the more extravagant coolers utilize peltier elements to cool the processor below ambient, and then use water cooling to cool the hot side of the peltier (which does get hot, hotter than the heat produced by the CPU alone). This combination can be very effective at chilling a CPU to far below ambient and sometimes well below freezing. At this point, insulation is needed to keep water from condensing out of the air onto the CPU and the surrounding components. This is the aspect of "super cooling" that I will mainly discuss in this article. I will provide some pictures showing more than just the insulation in my project, so you can get a feel of the magnitude of the components used (however, most of them have been replaced by better components. I plan to detail other portions of my water cooler in other articles). And remember, this web page details only my experience and the materials I used.
OK, on with the good stuff. Here are the other components I used:
|
|
|
|
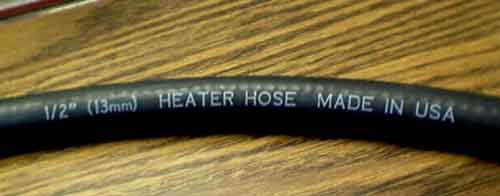
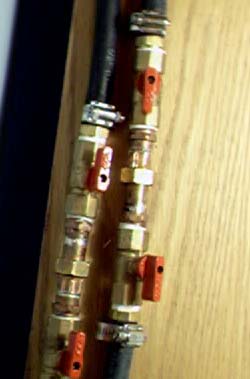
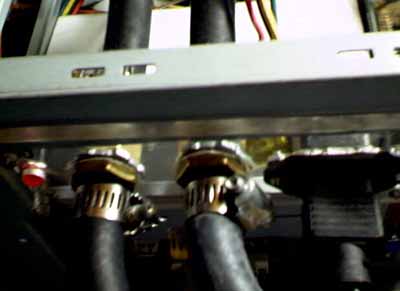
I used "HI TEMP HEATER HOSE" from Autozone (although it can be acquired at many other stores, including some hardware stores). This hose proved to be MUCH better than vinyl tubing because it compresses a lot better around hose clamps for less leaks, and will not deform due to higher temperatures from peltiers. In the second pic, you can see 4 gas valves (2 pairs of 2). Between each pair I inserted a copper union. This setup is used as a "quick disconnect": all I have to do is close each of the valves, open the unions, and haul the cooler and computer away to a new location. Once arrived, I just reconnect the unions and open the valves and all is ready to go again. The only disadvantage this has is that it looses a tiny bit of coolant each time I disconnect them, and I introduce a little air when I reconnect them, but not too bad. It usually works it's way out quickly.
|
|
|
|
|
|
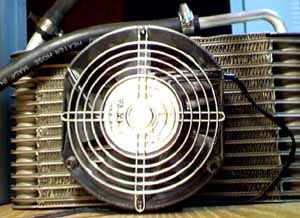
This is the radiator (a heater core I got from a local
dismantler) that I used to use. I no longer use it, as I
got a large A/C condenser coil which is *MUCH*
better, and allows me to mount six of those 6" air
hockey table fans you see in the picture (a little loud
at full bore, but when not at full voltage are pretty
quiet and still move quite a bit of air).
|
|
|
|
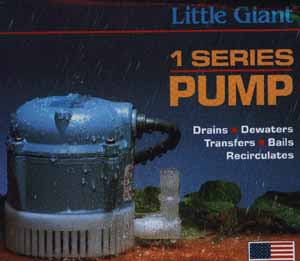
After using a 60 gph Little Giant pump for about 10
months, I started to notice a leak developing around
certain parts of the pump that inhibited the flow rate,
so I thought a new pump was in order (60 gph is
really under rated anyway.. it worked all right for my
passive water cooler, but not with the three 84 watt
peltiers I use now. In fact, when I got my first set of
peltiers I was still using that pump and the peltiers
overheated... charring my insulation and burning one
of the peltiers up. Check out the water jacket section
for a look at that). So I got the one in the picture,
which is 205 gph @ 1 foot of head pressure, with a
max head pressure of 7.4 feet. This increased the
flow rate tremendously, and my temps fell from -5
deg C at idle to around -25 deg C (-15 deg C full
load). BTW, I chose a Little Giant pump because
they are extremely quiet. I could not hear my
previous pump running at all, and this one is almost as
quiet; sometimes I get a slight hint of a "whiring"
sound. This pump is also in a cast aluminum housing
with a protective epoxy coating.
|
|
|
|
|
|
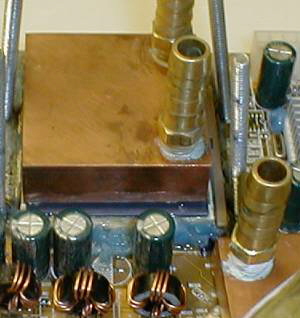
Although the water jacket in the first picture is not
the current water jacket I use, it is very close to the
design of my current one. They are both 6" long
with similar mounting holes, but my current one
(second picture) was made from three 6"x2"x1/4"
copper bars, while the one pictured to the right was
made from a 6"x1.5"x1" copper bar.
I originally tried to use the 1.5" one with my peltiers,
but it proved to be just a little too narrow (40 mm TEC's
very close fit), so I opted to make a new 2" wide
block. The one I currently use also has the
inlet/outlet pipes coming out one of the larger faces
(rather than out of the top, like the one pictured
first). Also, this block has 2 rows of 4 holes (8
total), drilled length wise through the block (each
hole is 3/16" in diameter), with the ends plugged with
large copper wire + soldered shut. My current one
just has a large channel with irregularity cut walls to
add turbulence. Notice the holes going from the top
to the bottom of the block (3/16" again). These
house some bolts that attach to little plastic "bridges"
that I made that attach to those 4 extra holes in front
of the Slot 1 connector.
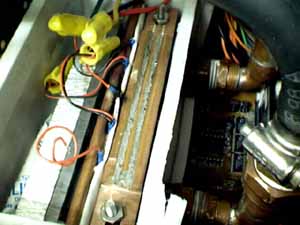
One more thing to note: the 4 holes on the front face of the water jacket are tapped with a 1/4-20 tap so that I can use nylon bolts to bolt the peltiers, cold plate, CPU, plastic insulator, and aluminum back plate to the water
jacket and then slip it over my mounting bolts and
into the slot 1 interface. You can see the current
water jacket, custom mounting bolts, and all the
different layers in the second pic (notice the
scorched insulation: this picture was taken before I
replaced the burned peltier). You can also just see
the bags of desiccant in the lower left. If you really
look hard, you will notice that I don't even loose a
RAM slot with this beast. :)
The best thing about using the 1/4-20 nylon bolts to
sandwich the entire mess together is that the holes
are farther apart than the CPU catridge is long - so
this can be used to mount to any Slot'ed CPU (ie,
Slot 1 - Slot 2 (why? heh) - Slot 1 -> Socket 370
adapters - Slot A, etc...
|
|
|
|
|
|
|
The Block
|
|
|
 |
|
|
The Mount
|
|
 |
|
|
|
|
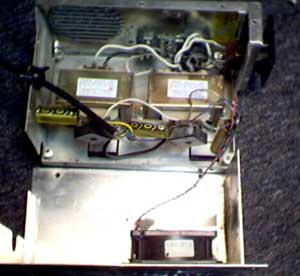
This is the power supply that was built in order to power my peltiers. I just gutted an old 63.5 Watt XT power supply, and "retro fitted" it for 480 Watts. It was originally built for two 31.8 volt peltiers @ 3.6 amps each (configured in parallel), so it's output is around 34 volts (the two transformers are 12V center tap, each at 5A RMS, so a total of about 34 volts up to around 14 amps). However, I have since changed peltiers to units that are 15.8 volts @ 7.6 amps, and so now I have to run the peltiers in series (under this load the PS puts out about 30 volts).
Notice that there is a bridge rectifier on the output of each transformer, and the outputs of the bridge rectifiers are paralleled together and filtered from there with 2 2200 micro F capacitors. There is also another 2200 micro F capacitor on the inside of my case, where I connect the peltier power up to the case. The second picture shows how the water lines enter the PC, and also show where my custom PS hooks up the the peltiers (the big black A/C style cord, which is really DC.. not too good I guess, just have to pay attention while I hook it up). You can also see the fairly good sized red LED that lights up when the heater circuit is activated, and that third capacitor for further filtering.
|
|
|
|
|
|
The Modified PS
|
|
 |
|
|
|
|
The Lines and Connections
|
|
|
|
| Random Forum Pic |
 |
| From Thread: Catch me if you dare........... |
|
| | ProCooling Poll: |
| So why the hell not? |
|
I agree!
|
 67% 67%
|
|
What?
|
 17% 17%
|
|
Hell NO!
|
 0% 0%
|
|
Worst Poll Ever.
|
 17% 17%
|
Total Votes:18Please Login to Vote!
|
|