|
|
|
|
 Micro Stealth Micro Stealth
|
|
Date Posted: May 10 2001
|
|
Author: Unaclocker
|
|
|
|
|
Posting Type: Article
|
|
Category: ProCooling Projects
|
|
Page: 3 of 3
|
|
Article Rank:No Rank Yet
Must Log In to Rank This Article
|
|
|
|
|
Note: This is a legacy article, imported from old code. Due to this some items on the page may not function as expected. Links, Colors, and some images may not be set correctly.
|
|
|
Micro Stealth By: Unaclocker
|
|
|
|
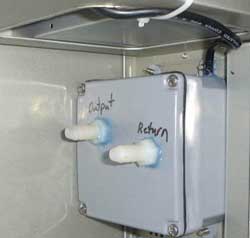
The next part was the reservior. This was a little more difficult as I had to drill 2 holes in the cover and put in the hose barb fittings. I didn't have a tap so I made the holes just a hair oversized. The pump's output was 1/2", which worked perfect because the threads that stuck through the cover on the hose barb were also 1/2". So I just ran a short length of 1/2" ID hose between the two. I put the return line below the level of the output line, but it may not have mattered. I did that mostly to prevent water from getting back into the lines when the machine is shut off.
|
|
|
|
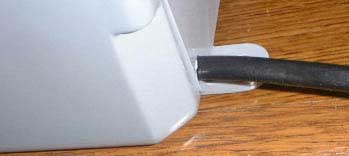
Next, I needed to work on wiring the pump. I drilled a small hole in the top back corner of the reservoir just large enough for the power cord to fit through and fished it up through that hole.
|
|
|
|
|
|
|
|
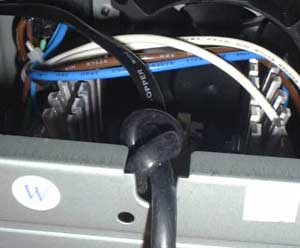
I then ran it up to the power supply. This power supply happened to have a spare opening in the front of it for some reason, so I used that hole to run the wire into it. I tied a large knot in the wire to prevent it being yanked out of the power supply which might cause an electrical fire. I also used a zip tie to hold the knot in place.
|
|
|
|
|
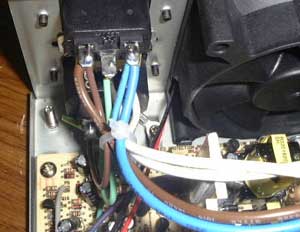
After that it was just a matter of stripping the wires and connecting them to the back of the plug where the power cord connects. This supply doesn't have a toggle switch in it like many ATX supplies do, so I was stuck with hard wiring the pump. When I stripped the outer insulation off the pump power cord, I found that it had blue and brown wires just like my power supply. Most pumps also have a third wire, green for ground. You want to make very sure you ONLY hook the green wire to the green wire from the wall inside your supply. Even if the color of the other two wires doesn't match, it doesn't matter which way you hook them up. Just as long as you have one wire going to each side. In my case the colors matched, so that's what I went with. Please make sure your power supply is unplugged at all times when it's open. And I highly recommend you use shrink-wrap to cover your work when your done. When the computer is plugged in, the pump is on. Luckily this pump is dead silent, you literally have to have your ear ON the case to hear the pump.
|
|
|
|
|
|
|
|
Once that was all wired up, I used some RTV sealant to seal the hole around the wire and to seal the hose barbs I had put in.
|
|
|
|
|
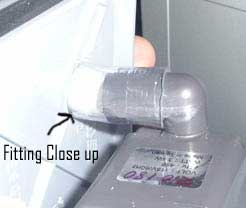
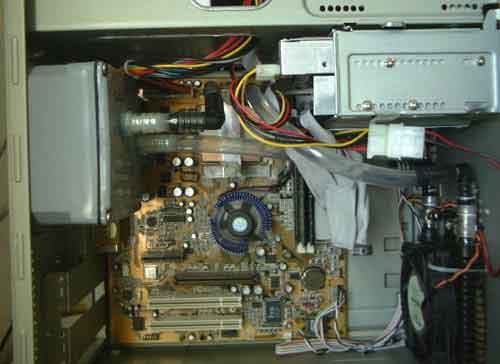
While that was drying, I drilled the holes in the back of the case to hang the reservoir. I used fan screws to hold it on which worked very well. All that was left was to decide how I wanted to route the hoses. I just went for what worked best. One hose coming off the block lined up perfectly with the output from the reservoir. I used a 90 to help make the sharp turn. The other line from the block went to the far side of the radiator. I had thought about using a 90 here too, but it worked out fine without having the extra restriction of another 90. All that was left after that was a straight run directly from the radiator back to the reservoir. Just to elaborate, there is a pool of water inside the reservoir (the grey junction box) and there's a pump inside of it. The water comes out one of the nozzles goes through a elbow fitting and down into the waterblock. It passes over the CPU inside the block and comes back out of the block. That hose angles downward and goes into the radiator where it's spread out and flows through tiny passages of aluminum with the fan drawing outside air over the aluminum. The water is cooler after leaving the radiator, and returns to the reservoir to flow through the system all over again.
|
|
|
|
Filling the system was a whole other ordeal. I should have put a fill cap on top of the reservoir which I will probably do before I send it off to my mother. For now, I filled it a lot like a closed loop system. I sucked water into the system and into the reservoir until it was primed. Then I turned on the pump and let it get the rest of the bubbles out. It worked, but it was a pain, and I got water all over the place while I was doing it. Luckily I used dyelite in the water, so a little inspection with the blacklight showed exactly where the water had splashed so that I could wipe it up before powering up the system.
|
|
|
|
 |
|
|
|
|
|
That's all there is to it. How does it perform? Well, the CPU idles around 85f and at full load hangs around 105f. It's also extremely quiet. The only thing I hear outside the case is the fan on the blue orb, which I may wire up for 7v so that it stops making so much noise. I also tried an experiment to see how the system would do without a fan on the radiator. It didn't do well. The CPU got up over 125f and was no longer stable and the hoses being so hot they were gummy to the touch. Pretty fun experiment. It took the system about 30 minutes at idle with the fan on to get back down to the 100f area. I've also put Win2k on this machine. A lot of people have been surprised to hear that I'm giving my mother a computer running Win2k. But if you think about it, it makes perfect sense. I want her computer to be as stable as possible, so that means Win2k.
All in all, I'd say this project met it's goals. I hope this article was helpful for someone out there. This could be used as a lanparty box if you wanted. Just use a Maze2 waterblock, a 1.1GHz AXIA at 1466, (assuming you upgrade to a 300watt power supply), upgrade the ram to 256megs, and toss in your favorite video & soundcards. I have no doubt it could be an extremely small and portable lanbox.
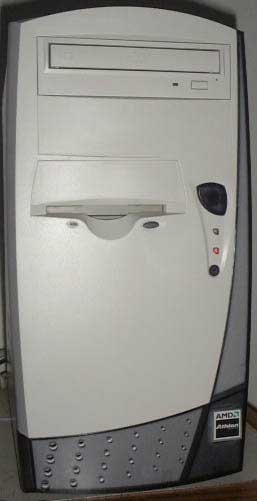
One last shot to show what the case looks like with the DVD drive installed. I'd like to thank CK42 (one of the regulars in ProCooling's Chat) for helping me to correct the grammar errors in this article. He spent a good hour going over it with a fine tooth comb
|
|
|
|
|
That about wraps this article up, If you have Questions please post them on the ProCooling Forums (recommended), or Email UnaClocker directly.
|
|
|
|
| Random Forum Pic |
 |
| From Thread: Finally Finshed New Rig! |
|
| | ProCooling Poll: |
| So why the hell not? |
|
I agree!
|
 67% 67%
|
|
What?
|
 17% 17%
|
|
Hell NO!
|
 0% 0%
|
|
Worst Poll Ever.
|
 17% 17%
|
Total Votes:18Please Login to Vote!
|
|