|
|
|
|
 Pro/Mini - The Uber LAN Box Pro/Mini - The Uber LAN Box
|
|
Date Posted: Feb 2 2001
|
|
Author: Joe
|
|
|
|
|
Posting Type: Article
|
|
Category: ProCooling Projects
|
|
Page: 6 of 10
|
|
Article Rank:No Rank Yet
Must Log In to Rank This Article
|
|
|
|
|
Note: This is a legacy article, imported from old code. Due to this some items on the page may not function as expected. Links, Colors, and some images may not be set correctly.
|
|
|
Pro/Mini - The Uber LAN Box By: Joe
|
|
Pro/Mini - The Uber Lan Box - Day 6 -
|
|
|
|
|
|
DAY 6 -
|
|
|
Lets Seal this Silicon Beyatch.
|
|
|
|
This is the good stuff...
|
|
|
|
Now we get to one of the more interesting parts of the project, the sealing of the CPU. we will start with a rather new way of getting the cold plate PERFECTLY on the core.
|
|
|
|
|
|
|
|
|
|
 |
|
|
|
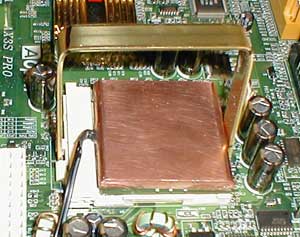
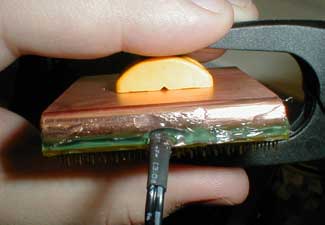
The Cold plate OCWC sent over was a lot bigger then I was originally planning for but it was all good. Its bout 1/4" thick of solid Cu and the entire size of the CPU plate.
To get it on the CPU perfectly straight and flat was going to be a lil more hard due to the weight of it, but I overcame it pretty fast :)
|
|
|
|
|
 |
|
|
|
|
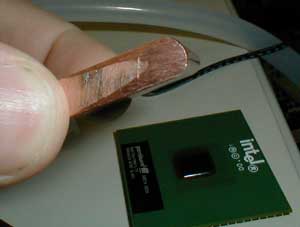
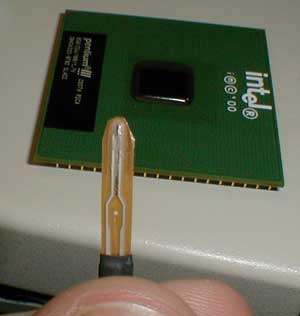
Lets get the Thermal probe placed first.
I trimmed off the excess film from infront of the themosistor. This allowed me to place the actual thermosistor ON the side of the CPU core (or at least on the sealant that Intel uses to seal the sides of the core.)
|
|
|
|
|
|
|
|
|
|
|
|
|
|
|
|
 |
|
|
|
 |
|
|
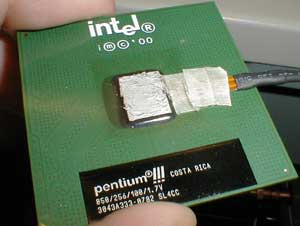
After applying a very thin coat of Arctic silver that Coolerguys.com sent over and tape'n the probe down securely we are ready to get into the interesting part of this!
|
|
|
|
|
|
 |
|
|
|
|
|
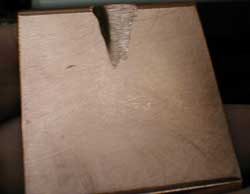
The Cold plate didn't quite fit right with the thermal probe.. the probe in some cases was higher then the core so to make sure the plate was absolutely level I ground out a mm or so of the plate in the area that the thermal probe will come out of.
|
|
|
|
|
|
|
|
|
|
|
|
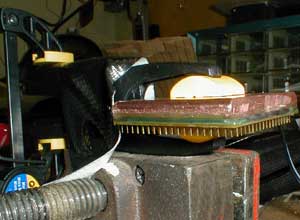
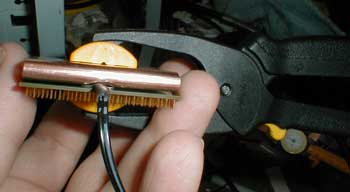
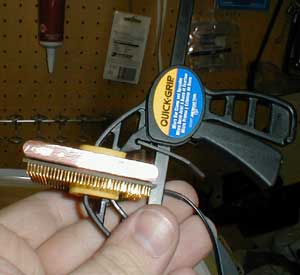
OK I picked this clamp up knowing that it prolly wouldn't work. It was close but it was not holding the CPU perfectly in the center. That was key, the method I used to compress the plate on the core MUST be PERFECTLY centered to avoid crushing the core.
So I headed back to a local hardware store and got a nice long reach parallel clamp.
|
|
|
|
 |
|
|
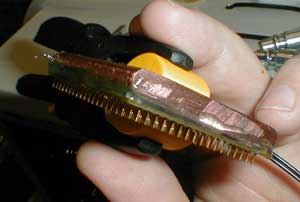
With some Marine Goop I sealed the cold plate onto the CPU creating a completely air tight and VERY solid bond between the core and the cold plate. Goop is VERY strong but not permanent, you can remove it with some hard work. Its a urethane based "glue" that starts to dry immediately. but takes a few hours to get solid. Even when fully dry its still flexible and will adjust to temp changes and different materials without cracking.
|
|
|
|
 |
|
|
|
|
|
|
|
|
|
|
 |
|
|
As you can see it holds it directly on the core and perfectly parallel. But this clamp was a ratchet type and I could not get it another "click" without possibly destroying the CPU. So I had to hold it a bit to keep it from moving around.
|
|
|
|
 |
|
|
|
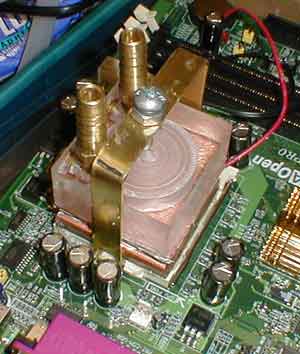
I was very careful to keep all the Goop off the bottom of the CPU or the top of the cold plate. You can see the thermal probe coming out.
|
|
|
|
|
|
Now the other clamp comes in. Since the "ratchet" clamp couldn't place enough pressure on the core while it dries and to make sure the Goop holds the plate hard against the core. I just squeezed down the grip clamp a few times to apply a lil extra pressure on the core and cold plate.
I duct taped it in place on a vice and let it dry for the last part of the afternoon.( I did all this at lunch ; came home from work to do it quick.) ( PLEASE BE CAREFUL if you do this!!!!, One bit of over pressure, or if the cold plate was crooked at all, it would have shattered the core with the pressure I was applying..)
|
|
|
|
Now lets insulate this rig!
|
|
|
|
|
|
OK from here to the rest of the article pictures may mis some parts of the process, I was getting VERY rushed to get this machine done in time.
Problem :
I DIDN'T have a CPU bracket!!! I had some but they were too short. So in a frantic hurry I ran to the store and picked up a piece of brass that measures 1/2" wide and 1/16" thick. ( I think). It was the exact same dimensions as the steel one I had that was too small.
What I did was bent it to match the width of the CPU socket, and with a RotoZip I cut out 2 areas on each side so it locked onto the socket.
I drilled a hole off center so its directly over the top of the block and the core. Then taped it and put the bolt through it. Used a nut on the bottom and one on the top to re-enforce it ( brass is soft and I doubts the threaded brass would hold)
|
|
|
|
|
| Random Forum Pic |
 |
| From Thread: "Radius" by BigBen2k |
|
| | ProCooling Poll: |
| So why the hell not? |
|
I agree!
|
 67% 67%
|
|
What?
|
 17% 17%
|
|
Hell NO!
|
 0% 0%
|
|
Worst Poll Ever.
|
 17% 17%
|
Total Votes:18Please Login to Vote!
|
|