|
|
|
|
 Pro/Mini - The Uber LAN Box Pro/Mini - The Uber LAN Box
|
|
Date Posted: Feb 2 2001
|
|
Author: Joe
|
|
|
|
|
Posting Type: Article
|
|
Category: ProCooling Projects
|
|
Page: 2 of 10
|
|
Article Rank:No Rank Yet
Must Log In to Rank This Article
|
|
|
|
|
Note: This is a legacy article, imported from old code. Due to this some items on the page may not function as expected. Links, Colors, and some images may not be set correctly.
|
|
|
Pro/Mini - The Uber LAN Box By: Joe
|
|
Pro/Mini - The Uber Lan Box - Day 2
|
|
Fire!!!, and we cut more stuff :)
|
|
|
|
|
|
|
|
|
|
|
|
|
|
|
|
 |
|
|
|
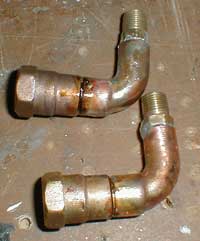
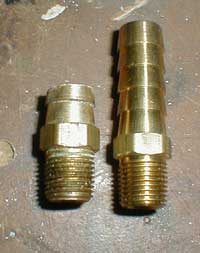
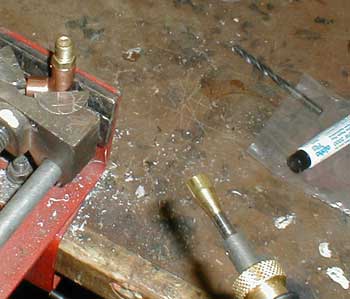
Since we just cut off the stock hose barbs off the radiator we need to replace em. With what you ask? well we are going to Mfg. some new ones, and this is where the fire comes into play.
First I took a 3/8" Hose Barb with a 1/8" NPT fitting. I cut it off like the pic shows.
|
|
|
|
|
|
 |
|
|
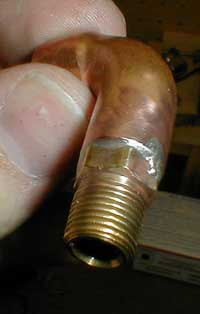
I found that the hose barb fits PERFECT into a 1/4"piece of Cu pipe. So I fluxed the interface and then soldered away. Just some advice when you solder pipe joints:
- Don't use a lot of solder, a lil will do.
- Get and keep the pipe interfaces hot the entire time you are soldering.
- and DON'T FREAK'n Touch the metal right after.. its HOT.
|
|
|
|
 |
|
|
|
|
|
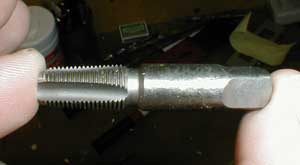
In the end I had 2 of these. I cleaned this up a lot with the steel brush wheel on the dremel cause right after soldering it looks pretty grungy. I tapped the holes in the radiator top with a 1/8" NPT tap. I would HIGHLY suggest using cutting oil on the tap or the Aluminum on the radiator will try and grab the tap.
|
|
|
|
|
|
 |
|
|
|
|
|
|
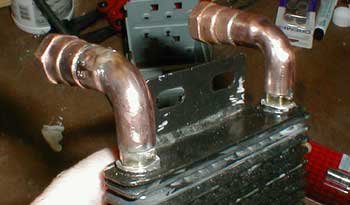
To finish it off I soldered on 2 1/4" NPT threaded ends on the 90Deg angles I made. I then threaded them onto the radiator and there you have it, A finished radiator. I sealed the interfaces with the brass and Al. with Plumbers Goop.
|
|
|
 |
|
|
|
|
|
|
Now, Lets Duct this Hot Air.
|
|
|
|
The air is going to be pulled through the radiator and then it would end up in the case. Now heating your case is not something that people want. So I had another trip around Ace Hardware looking for goods to help duct the air.
|
|
|
|
|
|
|
|
|
|
|
|
|
|
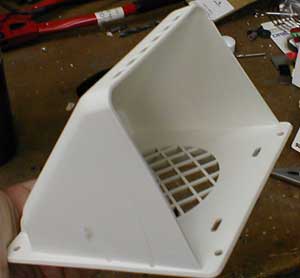
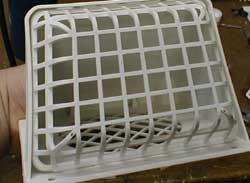
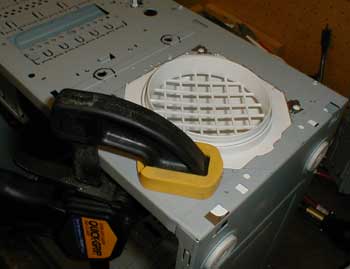
I found this dryer vent. I dunno why but out of all the others this one just rules. Its all Plastic for easy cutting, compact, and open. It has a removable plastic grate on the square side and the inner part needs to be cut out. It cost about 4.50$ and its meant for a 4" dryer hose.
|
|
|
|
 |
|
|
|
 |
|
|
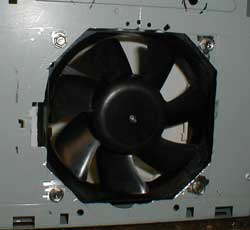
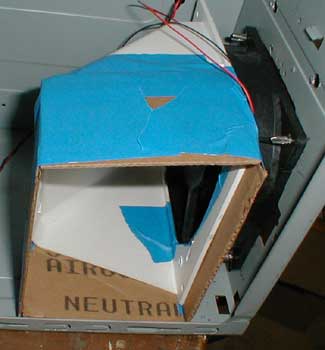
I mounted The 120mm high speed Panaflo Fan supplied by CaseEtc.com to the duct with Zip Ties and it is VERY secure. I then used Masking tape to plan out the rest of the duct work. I just used some spare corrugated cardboard for the extension of the duct.
|
|
|
|
 |
|
|
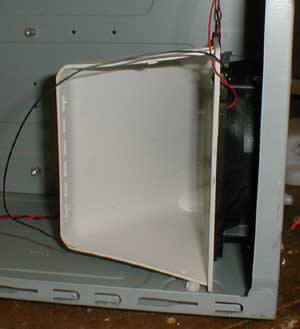
I used the masking taped up duct to size and place the side case cuts.
|
|
|
|
|
|
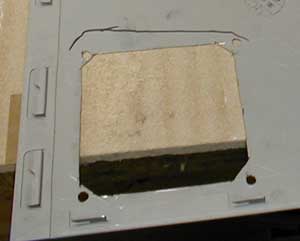
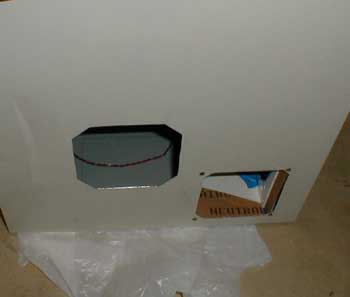
I found where the duct work meets the the door and with my arm in side drew that black line on the top of the cut, then I used one of the Al. Mesh 120mm filters for the opening to plot the holes. and then drilled em out. It may look like rough cuts, but all the cuts I made were sanded with a 400grit Dremel wheel. The cuts are smoother and more free of burrs then the factory cuts on the case.
|
|
|
|
|
|
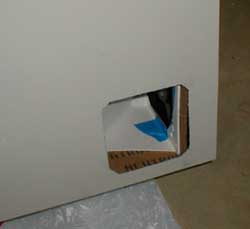
I got antsy so I also measured up and cut the opening for the Papst 120mm door fan that will be used to cool the innards of the machine. I used the same Octagon cuts for the fan placement and the openings. I am using the 120mm Aluminum mesh filters. I am securing them on the side door with Brass bolts to give it just a lil trick look.
|
|
|
 |
|
|
|
|
|
|
| Random Forum Pic |
 |
| From Thread: The next evolution to cathar's microchannel design |
|
| | ProCooling Poll: |
| So why the hell not? |
|
I agree!
|
 67% 67%
|
|
What?
|
 17% 17%
|
|
Hell NO!
|
 0% 0%
|
|
Worst Poll Ever.
|
 17% 17%
|
Total Votes:18Please Login to Vote!
|
|