|
|
|
|
 Double Header 3 Double Header 3
|
|
Date Posted: Dec 24 2000
|
|
Author: Joe
|
|
|
|
|
Posting Type: Article
|
|
Category: ProCooling Projects
|
|
Page: 11 of 17
|
Article Rank: from 2 Readers
Must Log In to Rank This Article from 2 Readers
Must Log In to Rank This Article
|
|
|
|
|
Note: This is a legacy article, imported from old code. Due to this some items on the page may not function as expected. Links, Colors, and some images may not be set correctly.
|
|
|
Double Header 3 By: Joe
|
|
Project: Double Header 3 Step 3 - Power Systems
|
|
|
|
AC Power Mains and Switch board -
|
|
|
|
To Give you some idea of how long it took to design plan and solder all this up, I watched the From the Earth to the Moon DVD set ( 12hrs worth) twice in one weekend while doing this (more like listened to it in the background). I started with a few key principals-
- KISS - Keep It Simple Stupid. I didn't want something so complicated it became dangerous ( just as Fire BAD ( or if you are James from Metallica - Napster BAD), so is Electrocution.
- Once again - modular, I need to make it so that I can change one part without having to rewire the entire system.
- SAFE ( again...) I was only shocked twice in this whole deal.. so I think I did a fairly good job at it :)
After I got the plan laid out, I proceeded to collect the much needed supplies. Like 60/40 Rosin Core Solder, 5 different sizes of Shrink tubing, Zippo Fluid for my lighter ( for the shrink tubing), and a lot of wire.
Thankfully I had a box of PC power cables, so I hacked 4 or 5 of them up to give me the main AC runs. For the other power runs I used the lil 60 - 75ft wire spool packs from Radio shack. I used 3 75ft packs up in this machine. (different gauges though so its not all just 1 type of wire).
OK Lets get onto the hackage:
|
|
|
|
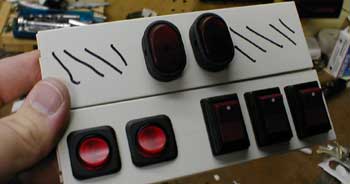
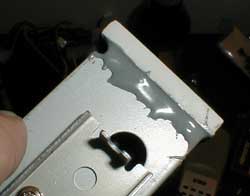
First thing I did was made the face plates, not necessary but it was simple enough to do at that point in time.
|
|
|
|
With the help of a Drill, and some rulers I got it all put in in a few min. The "\\\" are for the placement of the Nurses.
|
|
|
|
|
|
|
|
|
|
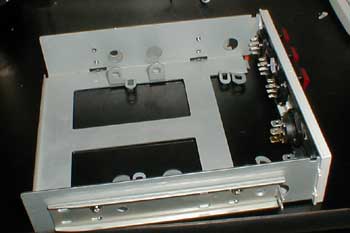
Next I had to mate it to a decommissioned Floppy ( or Backup drive) holder. Nuth'n like the smell of JB weld in the morning! ( I JB'd it after I did all the wire work.)
|
|
 |
|
|
|
|
|
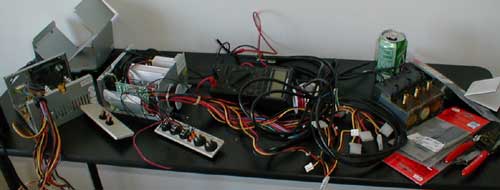
This was the operating table. In the pic you can see I soldered on some of the leads on the face plate already, don't worry we will cover all that :)
|
|
|
|
Next I rounded up my 2 PSU's, the one from the Addtronics, and then the 300AT I had laying around. I stripped out the AT first.
|
|
|
|
|
|
I stripped it of both its jacks and the power switch, and only left the 2 power wires and the grounding wire. on the 300AT.
|
|
|
|
|
OK Lets Rip this ATX PSU to pieces :)
|
|
|
|
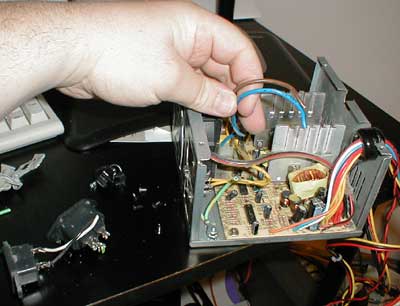
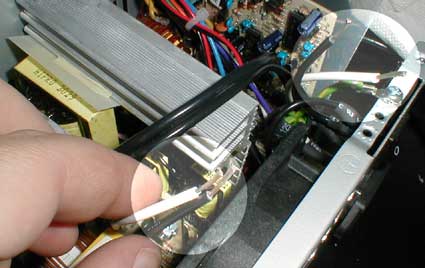
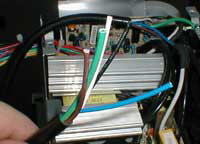
First thing I did was I found the 2 wires that fed the ATX PSU's power, and cut em. In the pic you can see, the one my hands on is the PSU leads, and the ones on the other side are coming off the switch, and the socket. No need to cut the grounding wire yet.
|
|
|
|
|
|
|
|
|
|
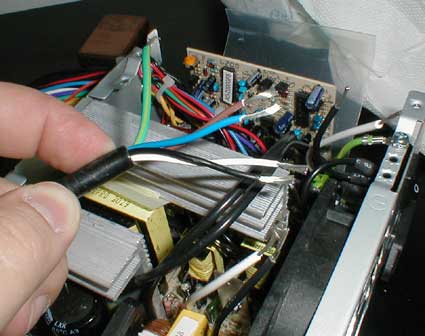
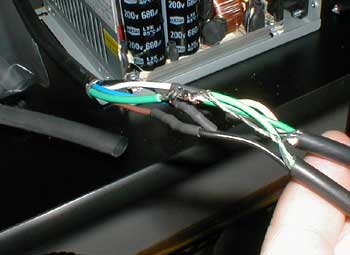
The wire I am holding is the original Switch power wire that my AT PSU used. Its PERFECT, as it has 5 conductors. What we are going to do is have the White and Black of the wire I am holding Take the power directly from the "Outlet" on the back of the PSU out of the PSU in the 5 conductor wire. That leaves us the 2 other conductors and the ground.
With the Brown and Blue wire I wire those to the PSU side of the wires I cut. and they will then lead out of the case. You starting to get it? We are putting a switch between the Black and white wires we cut, but we are just extending them to the front of the case. If you don't quite get it yet, the next pictures will help.
I am using the single 5 conductor wire so I can fit it out a pre made opening for one wire its size to exit the front of the PSU. Otherwise I would need 2 of the standard 3 conductor wires.
|
|
|
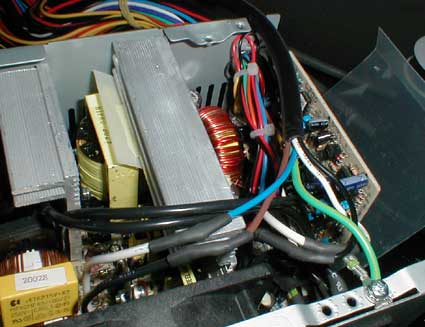
Here it is all soldered in.
|
|
|
|
|
|
I have 1 big black wire leaving the PSU unit now and it carries 1 outbound AC set of wires ( the Mains for the entire box), and then 2 lines back into the PSU to supply power to the PSU, and then 1 ground.
Ok got it? Lets confuse it a bit more. The 5 conductor wire I am using was only 1 or 2 ft. long. So I needed to use 2 3 conductor lines to extend it like in the pic below.
|
|
|
|
|
The Other end of the 5 conductor wire. Still very short of the length I needed.
|
|
 |
|
|
|
|
|
|
The original 5 wire now split into 2 3 conductor wires
|
|
 |
|
|
|
|
|
|
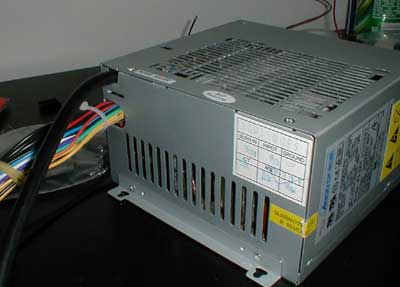
And that's it for the PSU. No more need to go in it ( unless there is a fire or something). (fingers crossed still)
|
|
|
|
|
| Random Forum Pic |
 |
| From Thread: Fairly Large Project: Oil+TEC Tank PC |
|
| | ProCooling Poll: |
| So why the hell not? |
|
I agree!
|
 67% 67%
|
|
What?
|
 17% 17%
|
|
Hell NO!
|
 0% 0%
|
|
Worst Poll Ever.
|
 17% 17%
|
Total Votes:18Please Login to Vote!
|
|