|
|
|
|
 Double Header 3 Double Header 3
|
|
Date Posted: Dec 24 2000
|
|
Author: Joe
|
|
|
|
|
Posting Type: Article
|
|
Category: ProCooling Projects
|
|
Page: 4 of 17
|
Article Rank: from 2 Readers
Must Log In to Rank This Article from 2 Readers
Must Log In to Rank This Article
|
|
|
|
|
Note: This is a legacy article, imported from old code. Due to this some items on the page may not function as expected. Links, Colors, and some images may not be set correctly.
|
|
|
Double Header 3 By: Joe
|
|
Project: Double Header 3 Step 2 - Cooling Systems
|
|
|
|
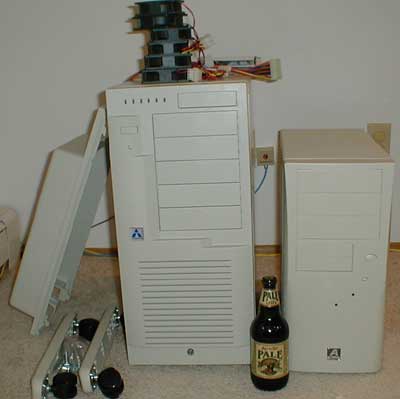
The Cooling system is the heart and sole of DH3. Everything in this system was built or modified to fit it. Including the case. The case itself is a VERY key part of this cooling system and was the palette that made this all possible. I am going to break down each part of this cooling system one at a time and then explain/Show how its all interconnected. Lets start with the Addtronics WTX8500 case.
|
|
|
|
Addtronics 8500 WTX case -
|
|
|
|
|
|
There's NO denying this is one Big mutha case. Besides it's generous inside space, its layout is pretty good. I do have some issues with it, but they are almost all based on me trying to do stuff with this case its not meant for. Like, its not terribly solid when you load it with NEAR 80lbs of stuff, and when you drill out the rivets on the top and remove top cap (since rivets normally mean "Don't Take this off") it becomes pretty flimsy. But when I got it from Addtronics or put it all together its very ROCK solid.
|
|
|
|
|
|
|
This majestic piece of hardware was supplied by Addtronics ( if only they knew how it would end up :). In the Pic you can see how it scales next to the AOpen HX45A. the case is big, but not so big you cant keep it in a Dorm, or small Apt. The Beer there is for scale.
|
|
|
|
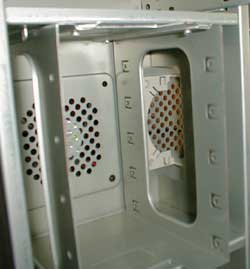
Internal Drive Bay
|
|
 |
|
|
|
|
|
|
|
|
|
|
|
|
|
|
|
|
|
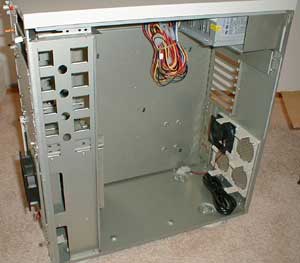
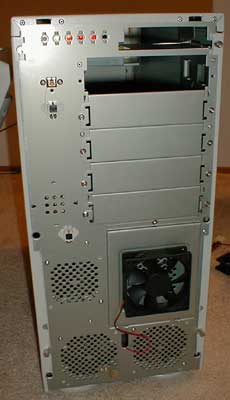
On The Inside of the WTX
|
|
Here's the inside of the WTX. Unlike a few people mentioned to pic's I have up, its NOT upside down. This is the beauty of the WTX standard. Intel Developed this standard to keep the CPU's lower in the case ( the cooler air is in the bottom if the case), and also it keeps the CPU's out of the way of the peripherals in the slots. You can see the 4 lugs on the Mobo back plate for the P4 Boards. above you can see the fan cooled drive bay. But doesn't that hole for a 92mm look small??? its smaller then a 80mm fan hole!!!... thats gunna change
The Fan Config is : 4 80mm's in the back 2 80mm's in the front, and 3 92mm's in the front. as well as 1 92mm in the PSU.
|
|
|
 |
|
|
|
|
|
|
 |
|
|
|
|
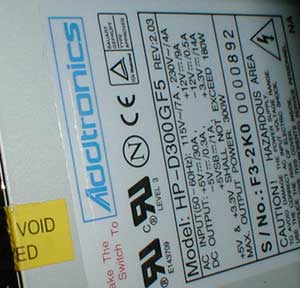
Speaking of PSU's - the included Addtronics 300Watt jobber is... OK. if you look at the specs 9A is the MAX on the 12V.... that's fairly weak. I was looking for more around 10 - 11 Amps. But since the Fans are going to be driven off a separate PSU all this one will need to power is 2 CPU's and the peripherals..... ( Notice the still intact Void if removed label... we will be defacing that soon enough :)
|
|
|
|
 |
|
|
|
|
|
|
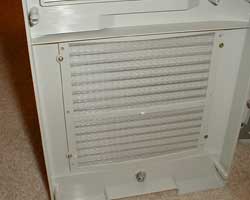
Front Air Filter
|
|
|
|
 |
|
|
|
|
|
OK to wrap up the look at the Case itself, the front was cleanly laid out. but DAMN Addtronics needs to take some schooling on air flow and how badly their fan grills cover up all the goodness those 92mm fans want to bring to them.
|
|
|
|
| Random Forum Pic |
 |
| From Thread: Possible good idea, please have read |
|
| | ProCooling Poll: |
| So why the hell not? |
|
I agree!
|
 67% 67%
|
|
What?
|
 17% 17%
|
|
Hell NO!
|
 0% 0%
|
|
Worst Poll Ever.
|
 17% 17%
|
Total Votes:18Please Login to Vote!
|
|